


If you have an AccuQuilt, then you know how helpful the dies are when it comes to cutting your borders,squares and even half square triangles.
AccuQuilt also has dies that make a whole project with one die! This Blog hop, organized by AccuQuilt, is dedicated to those B.O.B. (Block on Board) dies!
During this blog hop, all of the patterns of the dies being featured on the blogs, will be available as free downloads on AccuQuilt’s website.
These dies are convenient; They allow you to cut all the pieces, that you need for a block, in one pass! And there’s no thinking as to where the pieces go, what more can you ask for? 🙂
You can read about my other B.O.B. Flowering snowball quilt here.

I have always wanted to do a Double Wedding ring quilt, but with so many pieces to cut, it never made it to my project list.
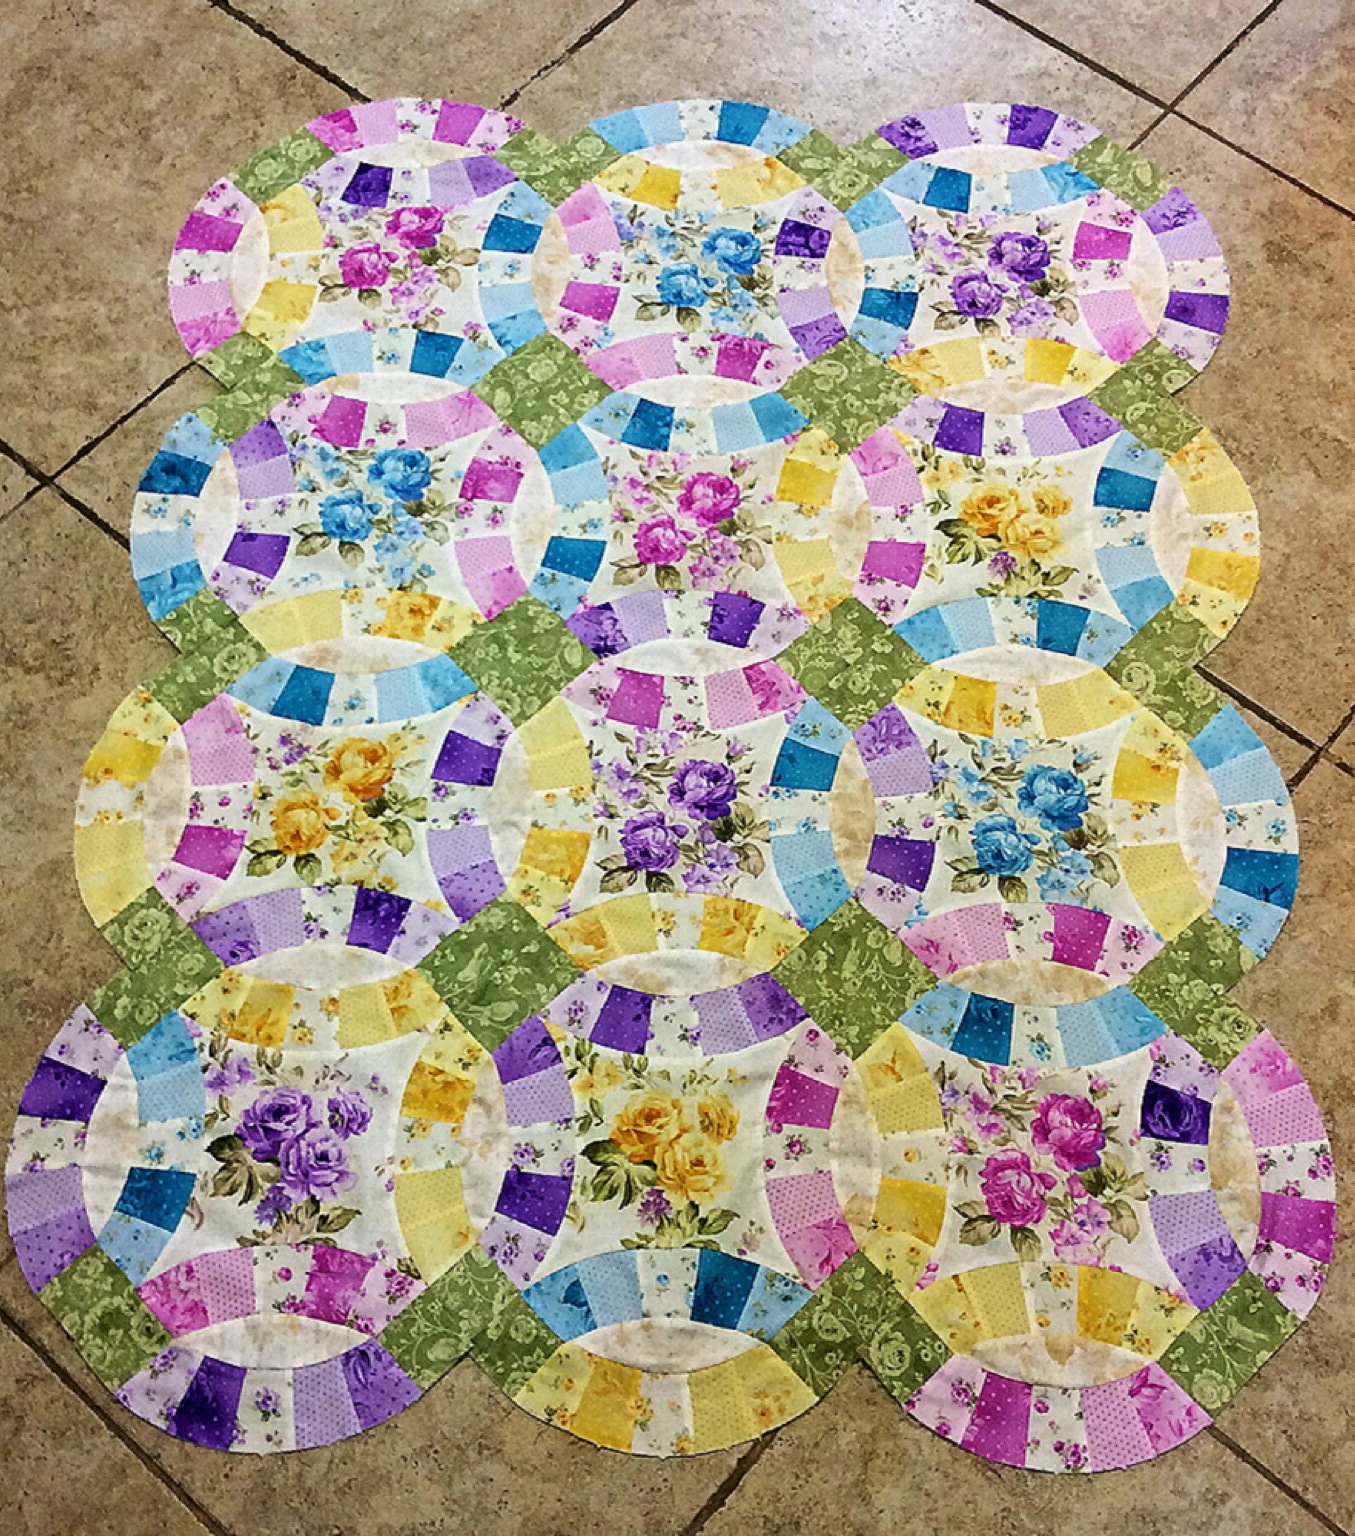
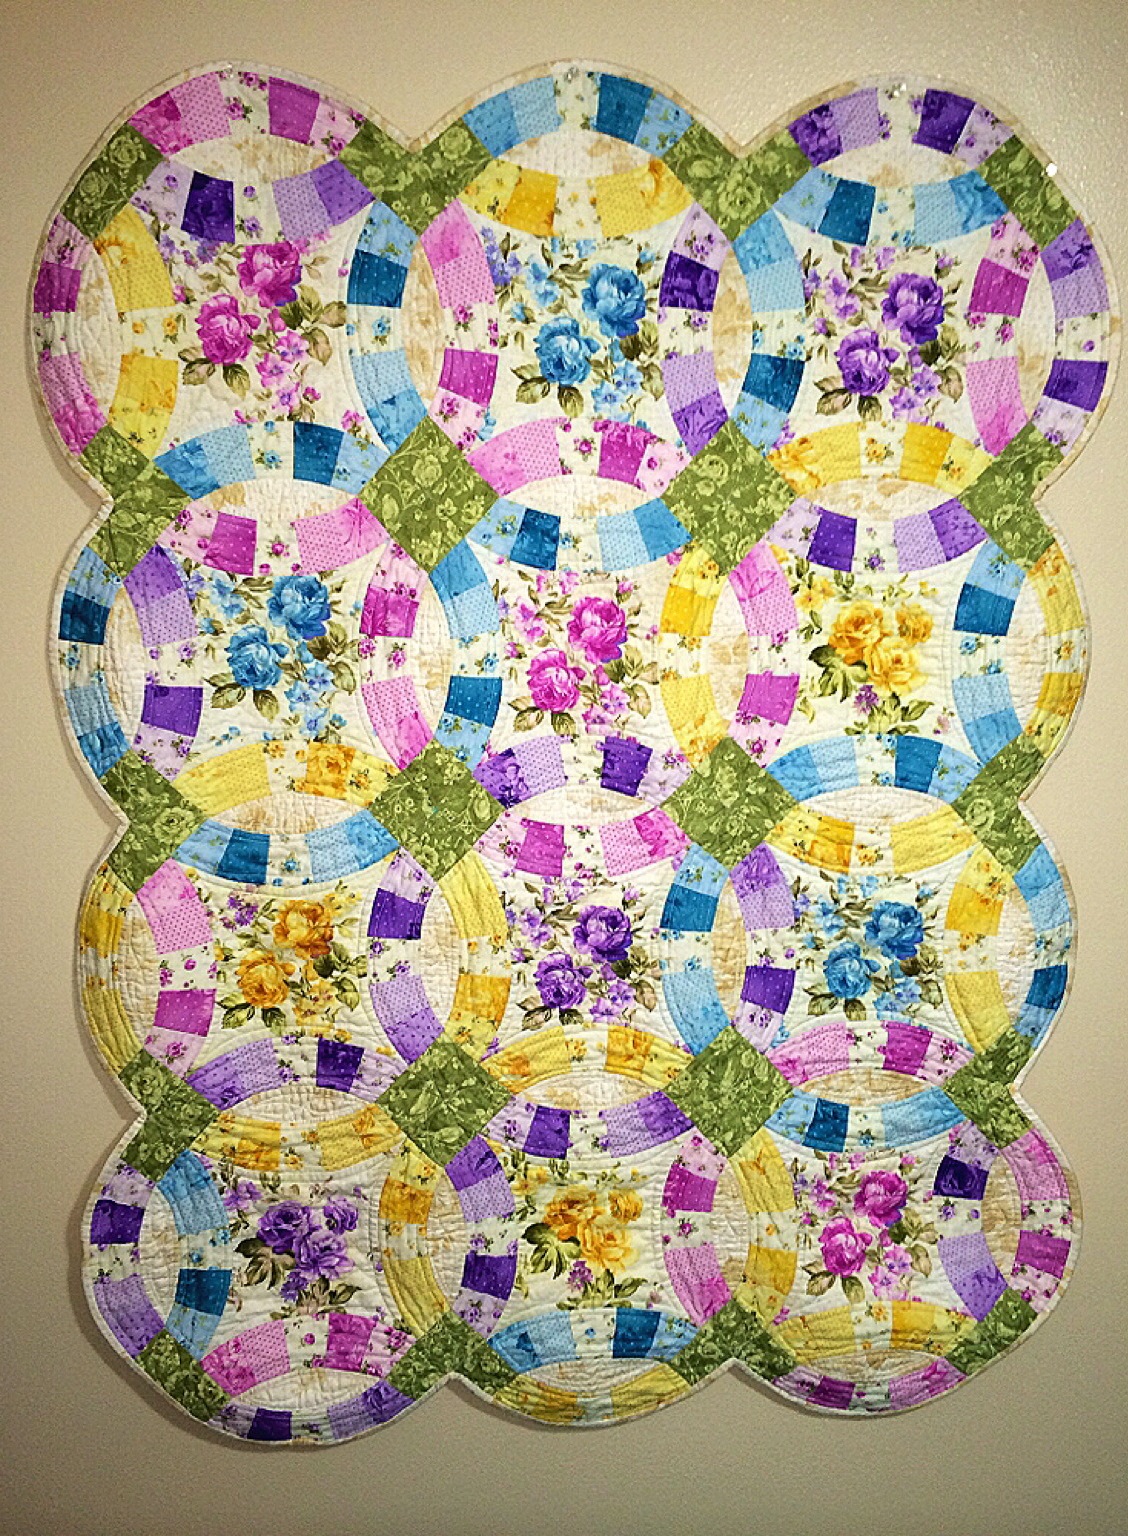
But now, thanks to AccuQuilt’s Go! Double Wedding Ring set die, it’s made it to my COMPLETED project list! This little quilt measure 36″ by 52″, I plan on hanging it somewhere. 🙂
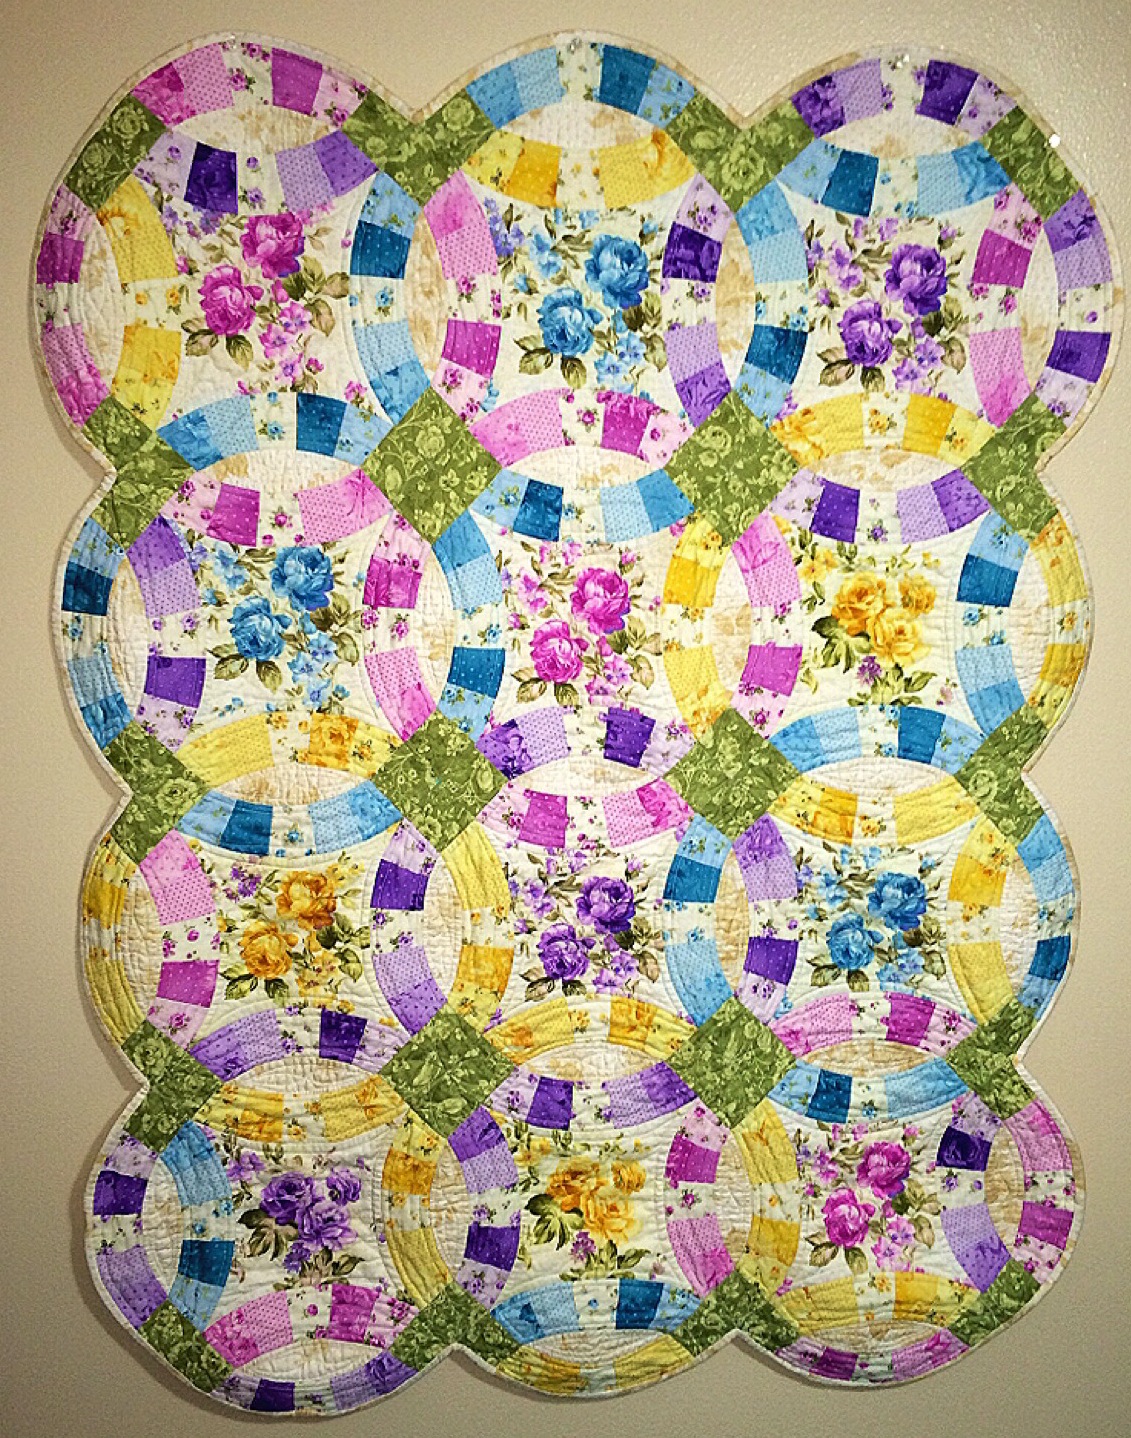

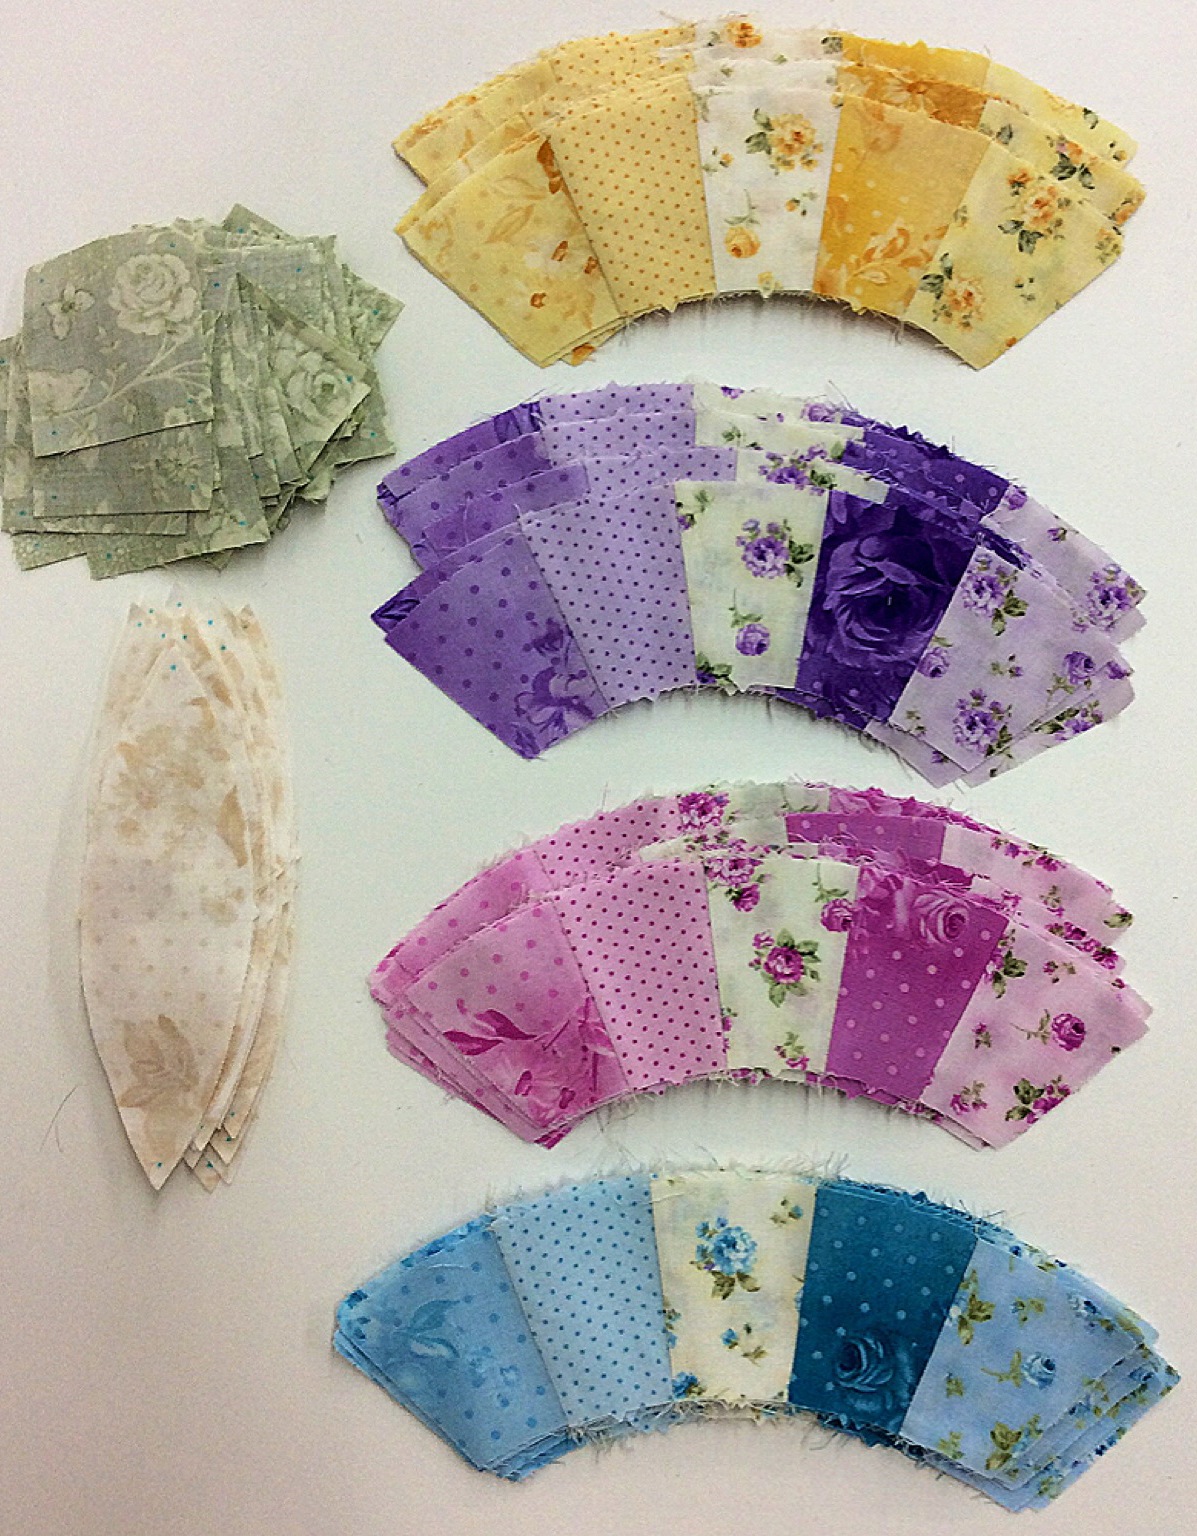
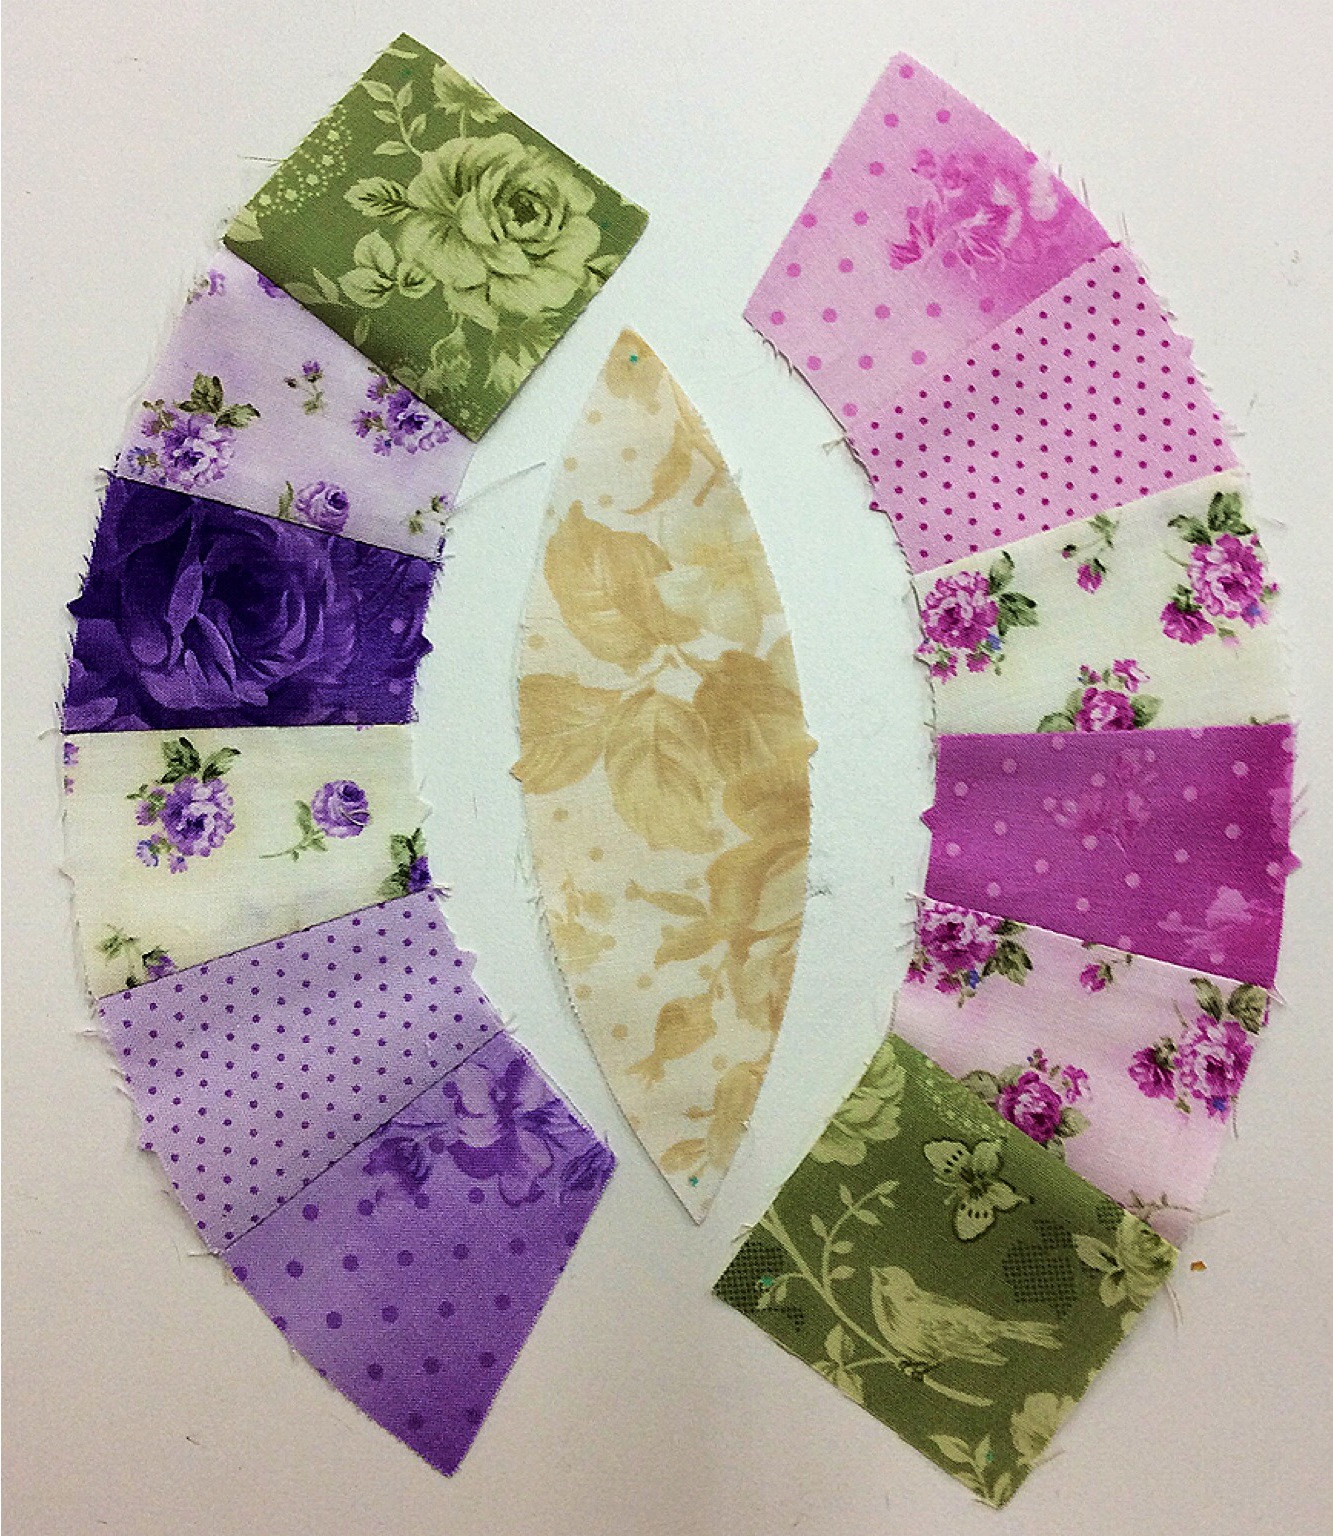
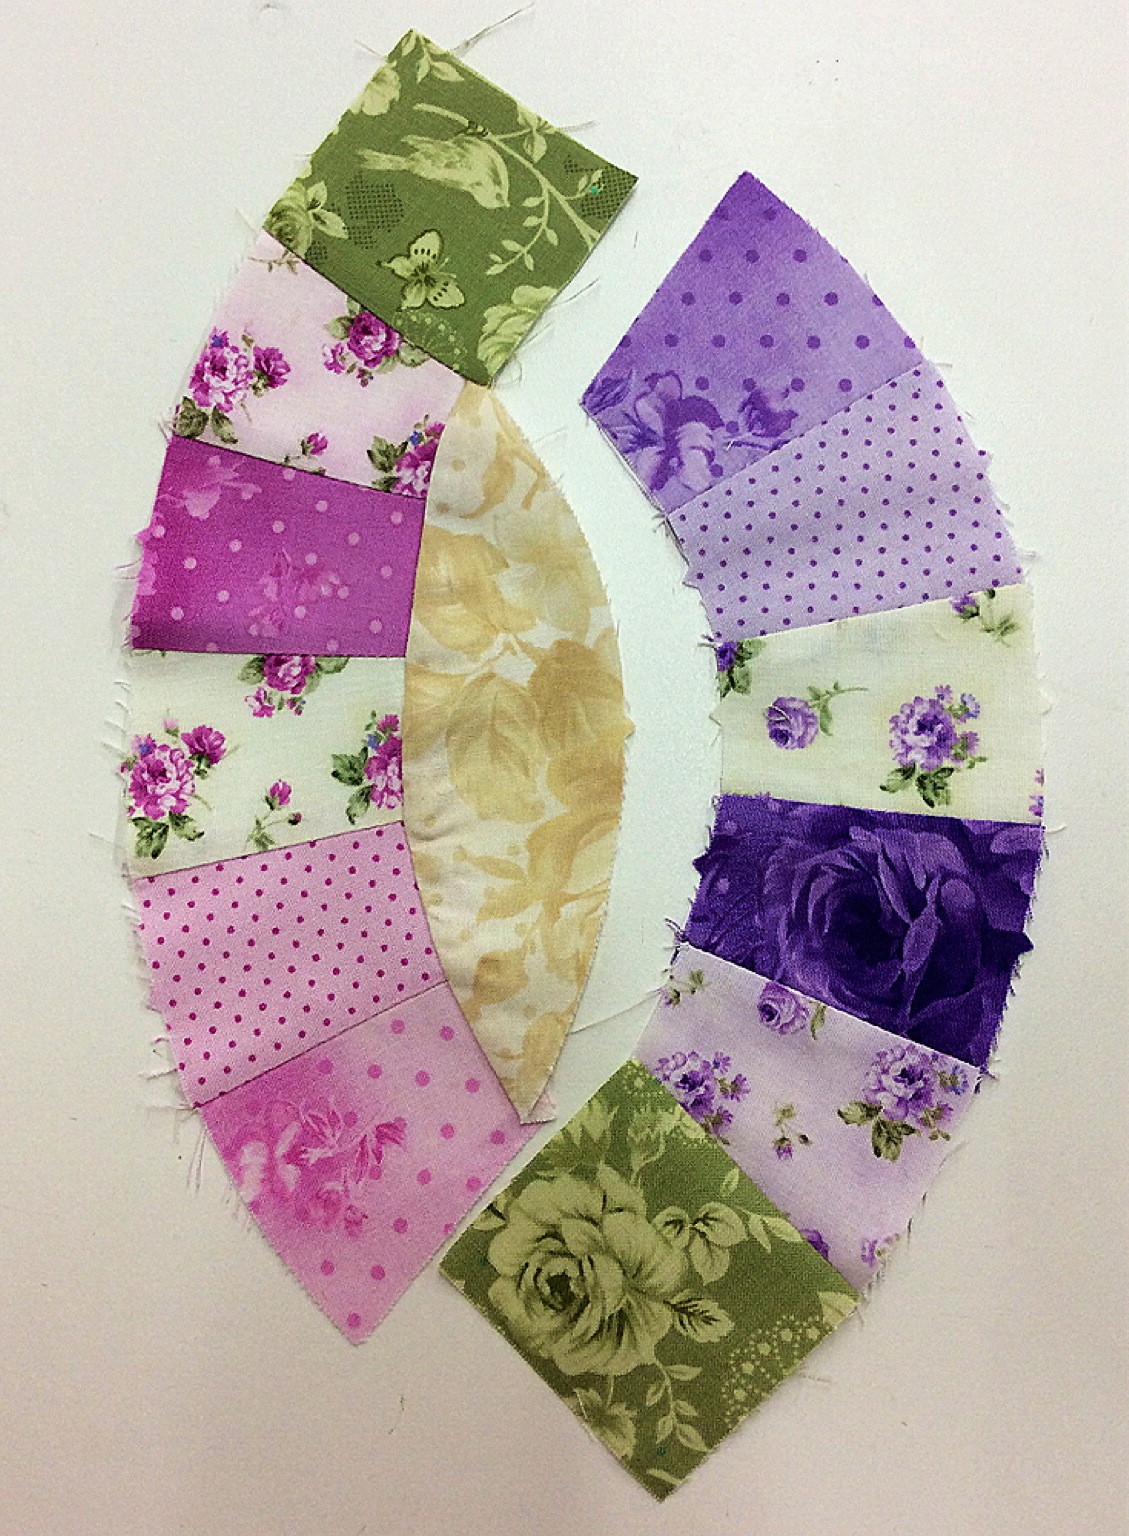
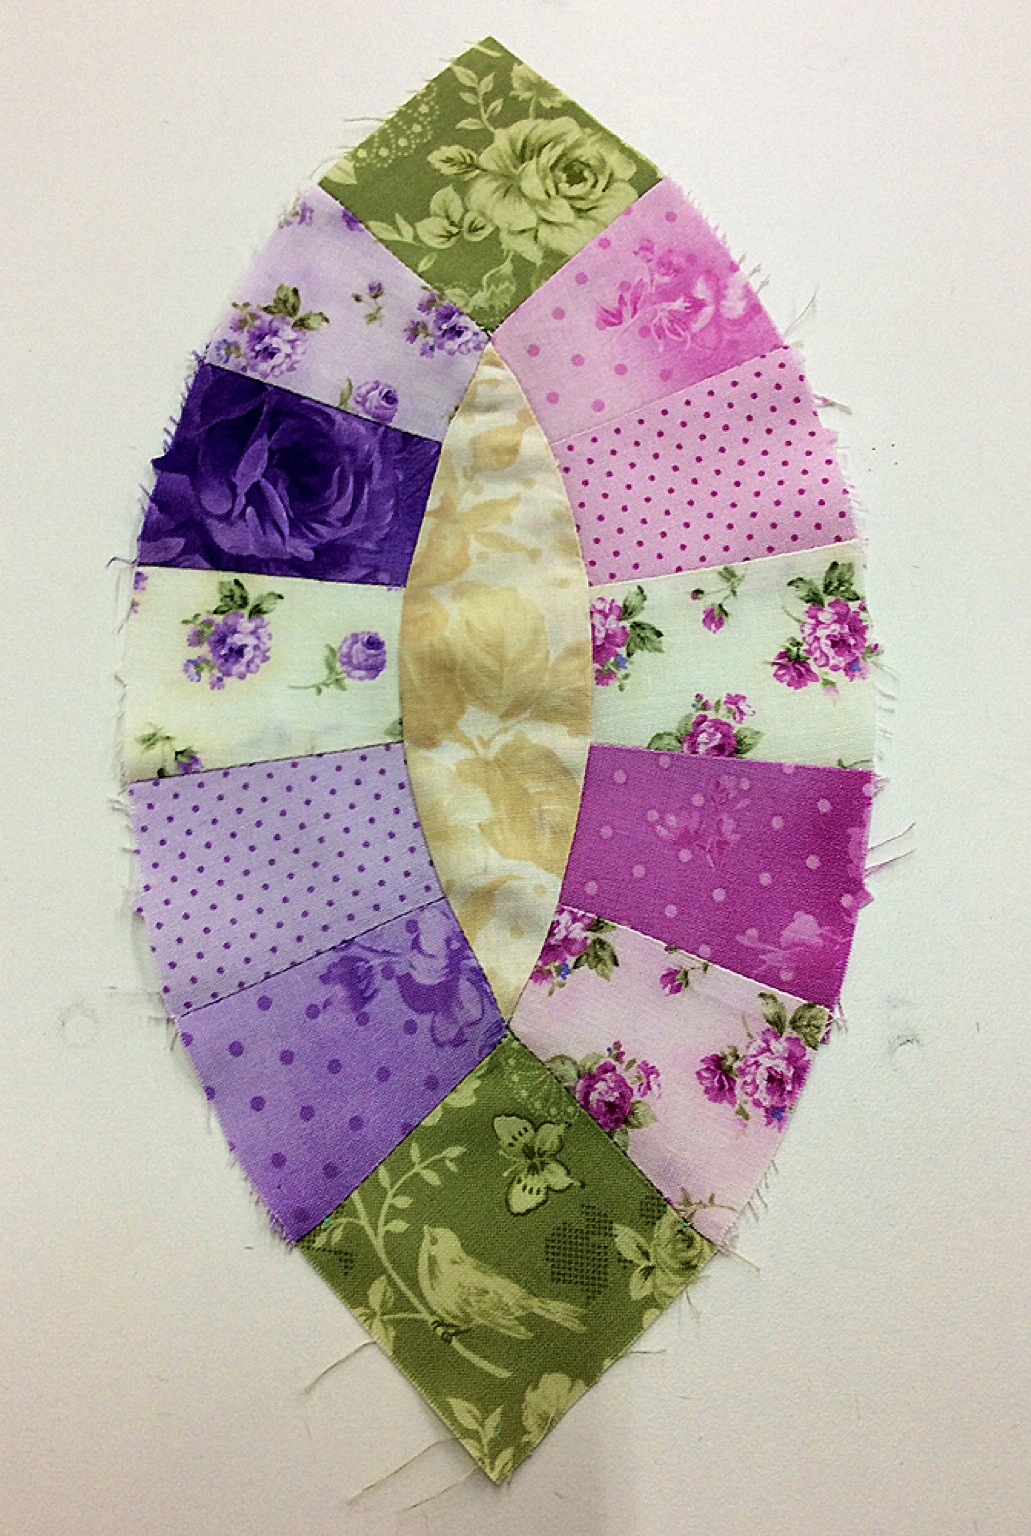
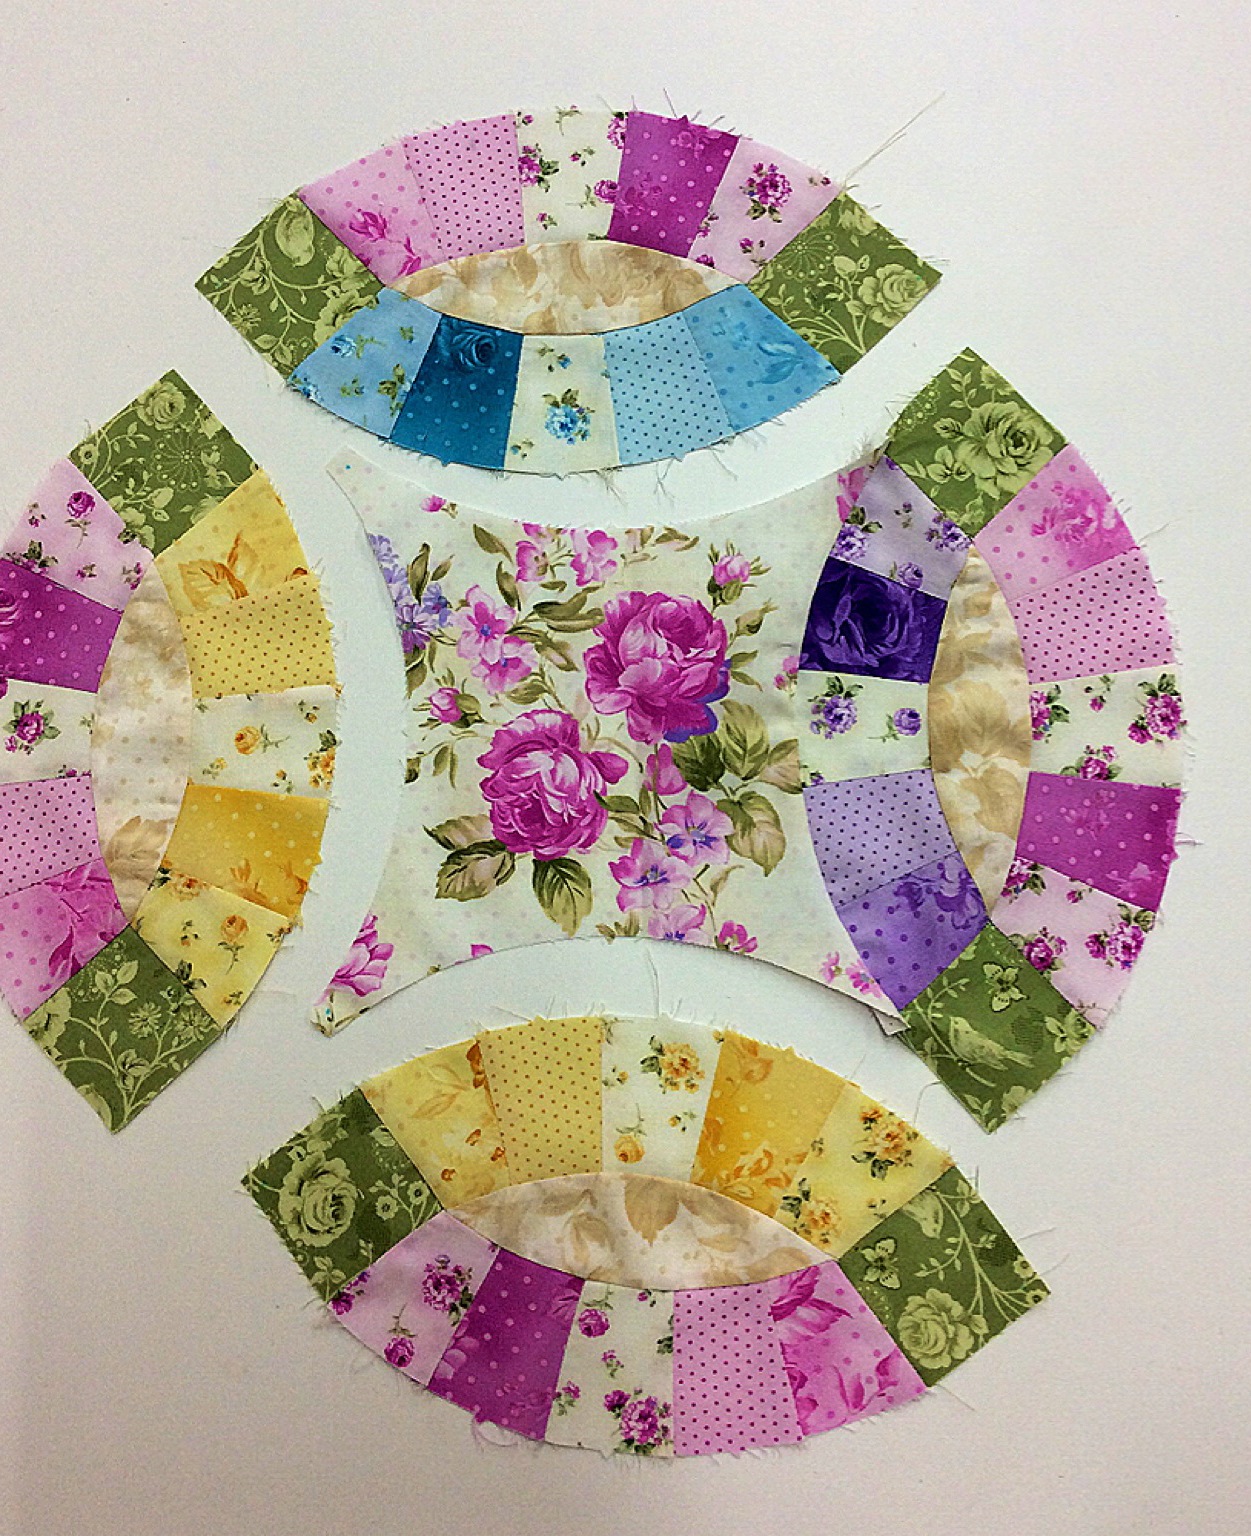
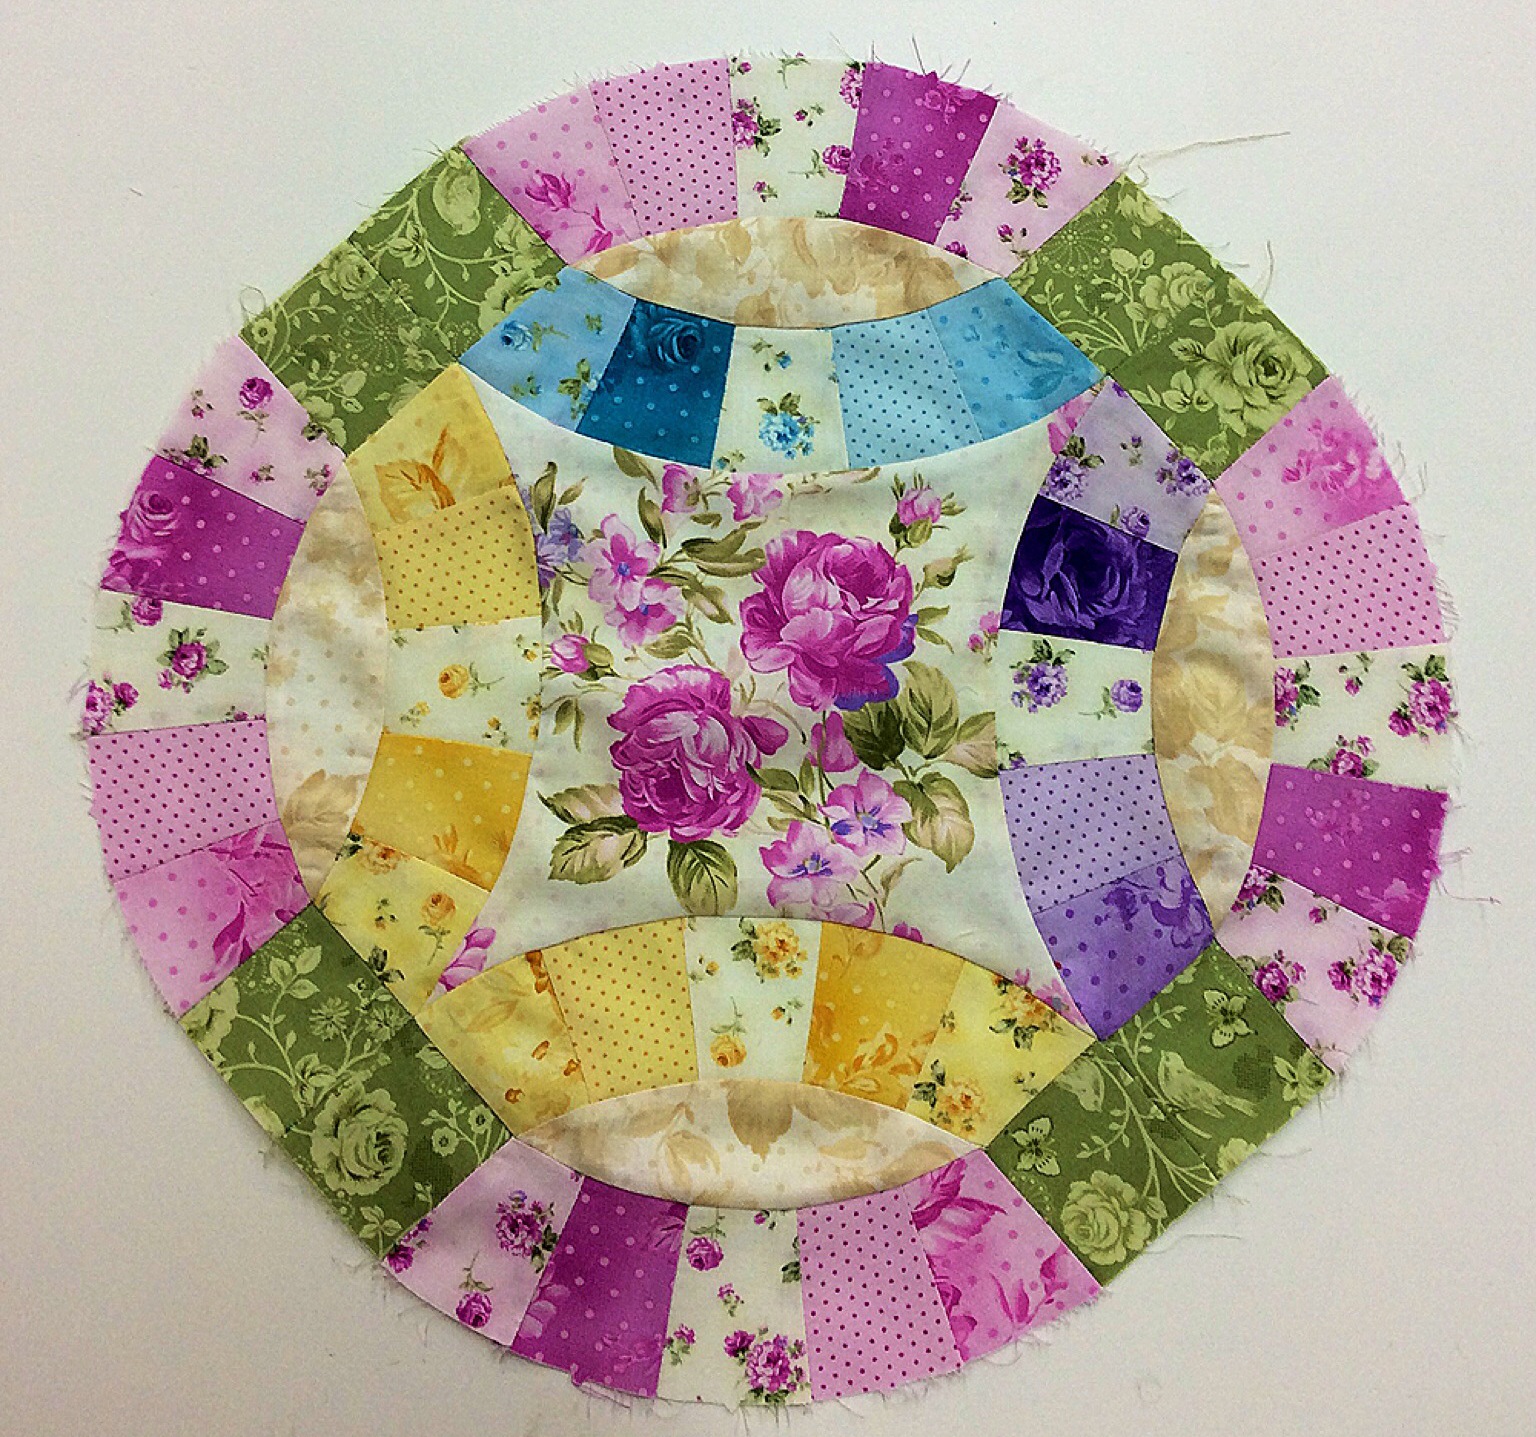
When I was sketching up my pattern for this quilt, I was inspired by stained glass. I’m not sure why, but I just envisioned a stained glass look for this quilt, different shades of the same colors per arch.
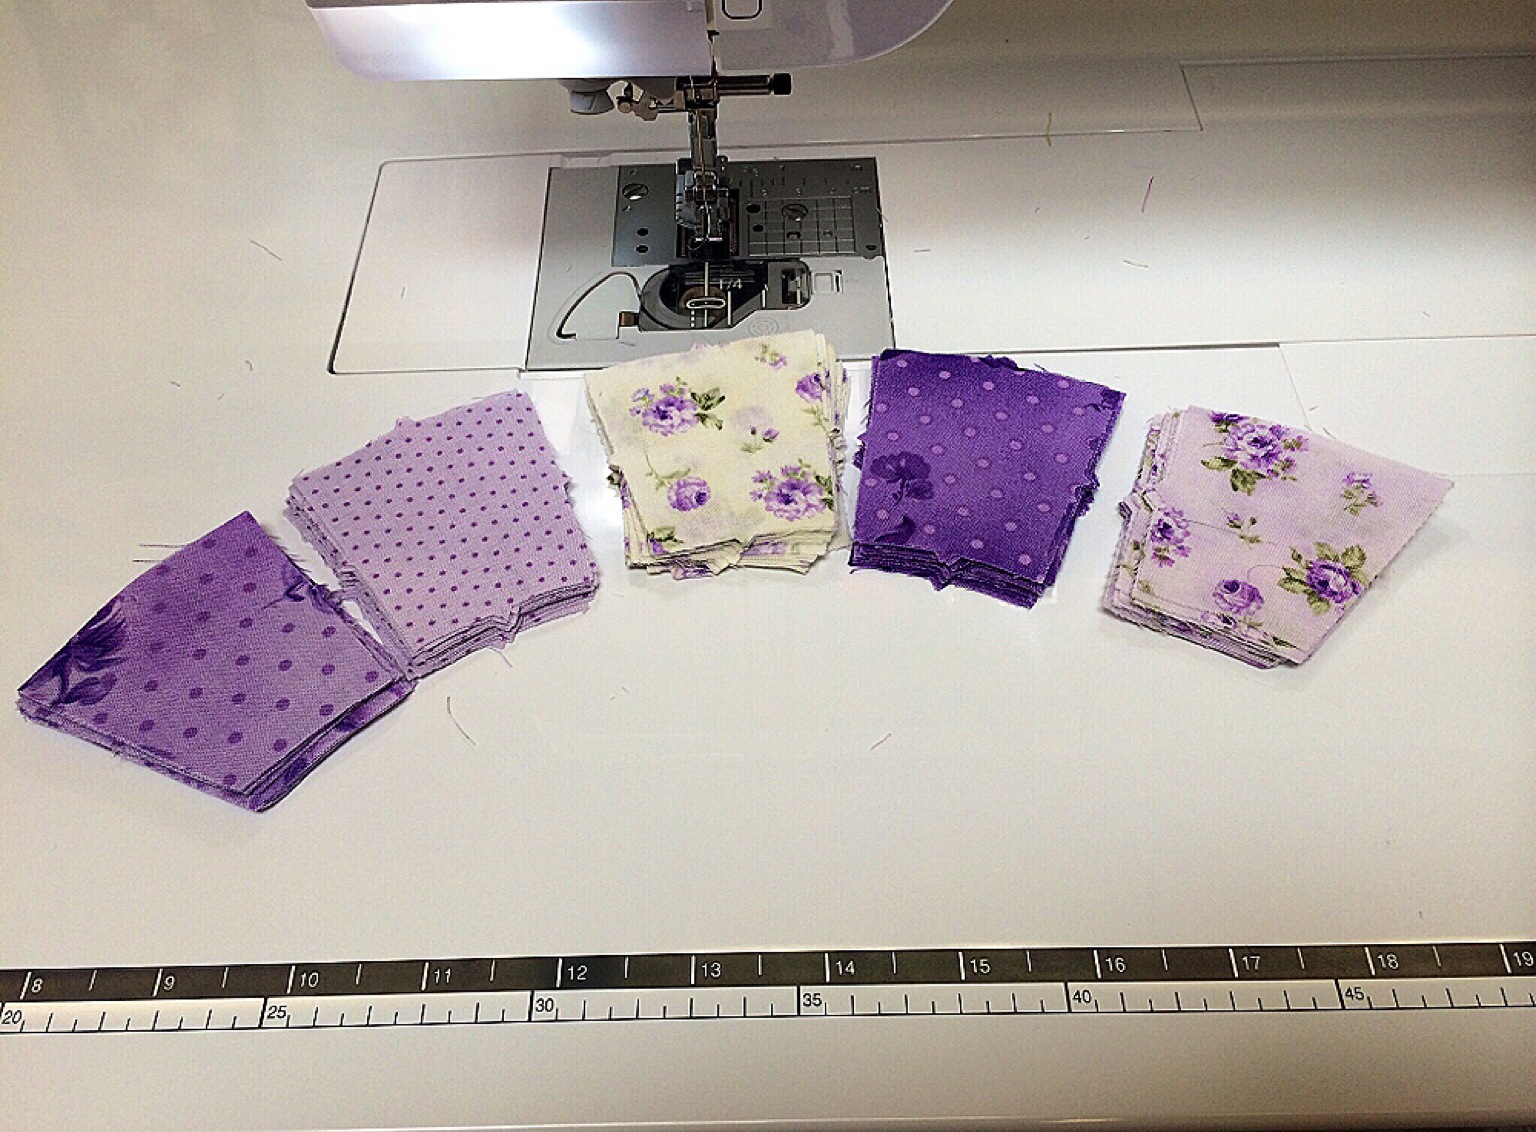
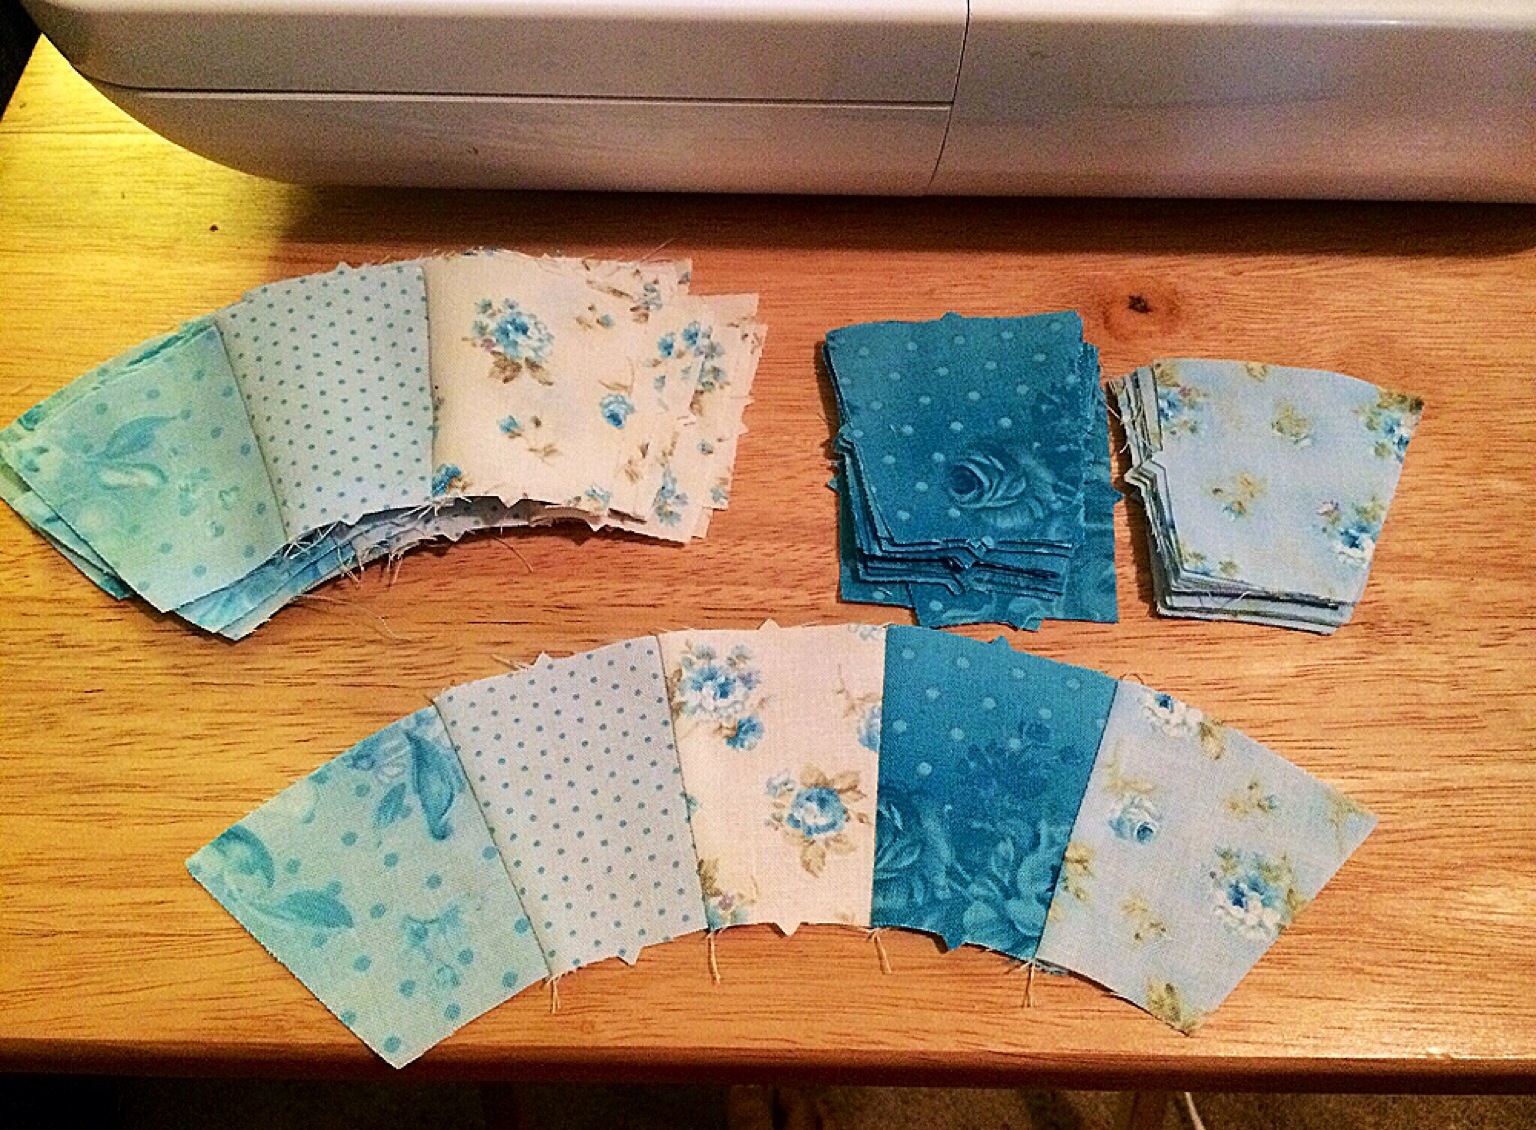
And naturally, I gravitated towards Eleanor’s new fabric line , Zoey Christine. All of the main colors have several coordinating colors, making it SUPER easy for the 5- piece “stained glass” arches on my double wedding ring quilt.
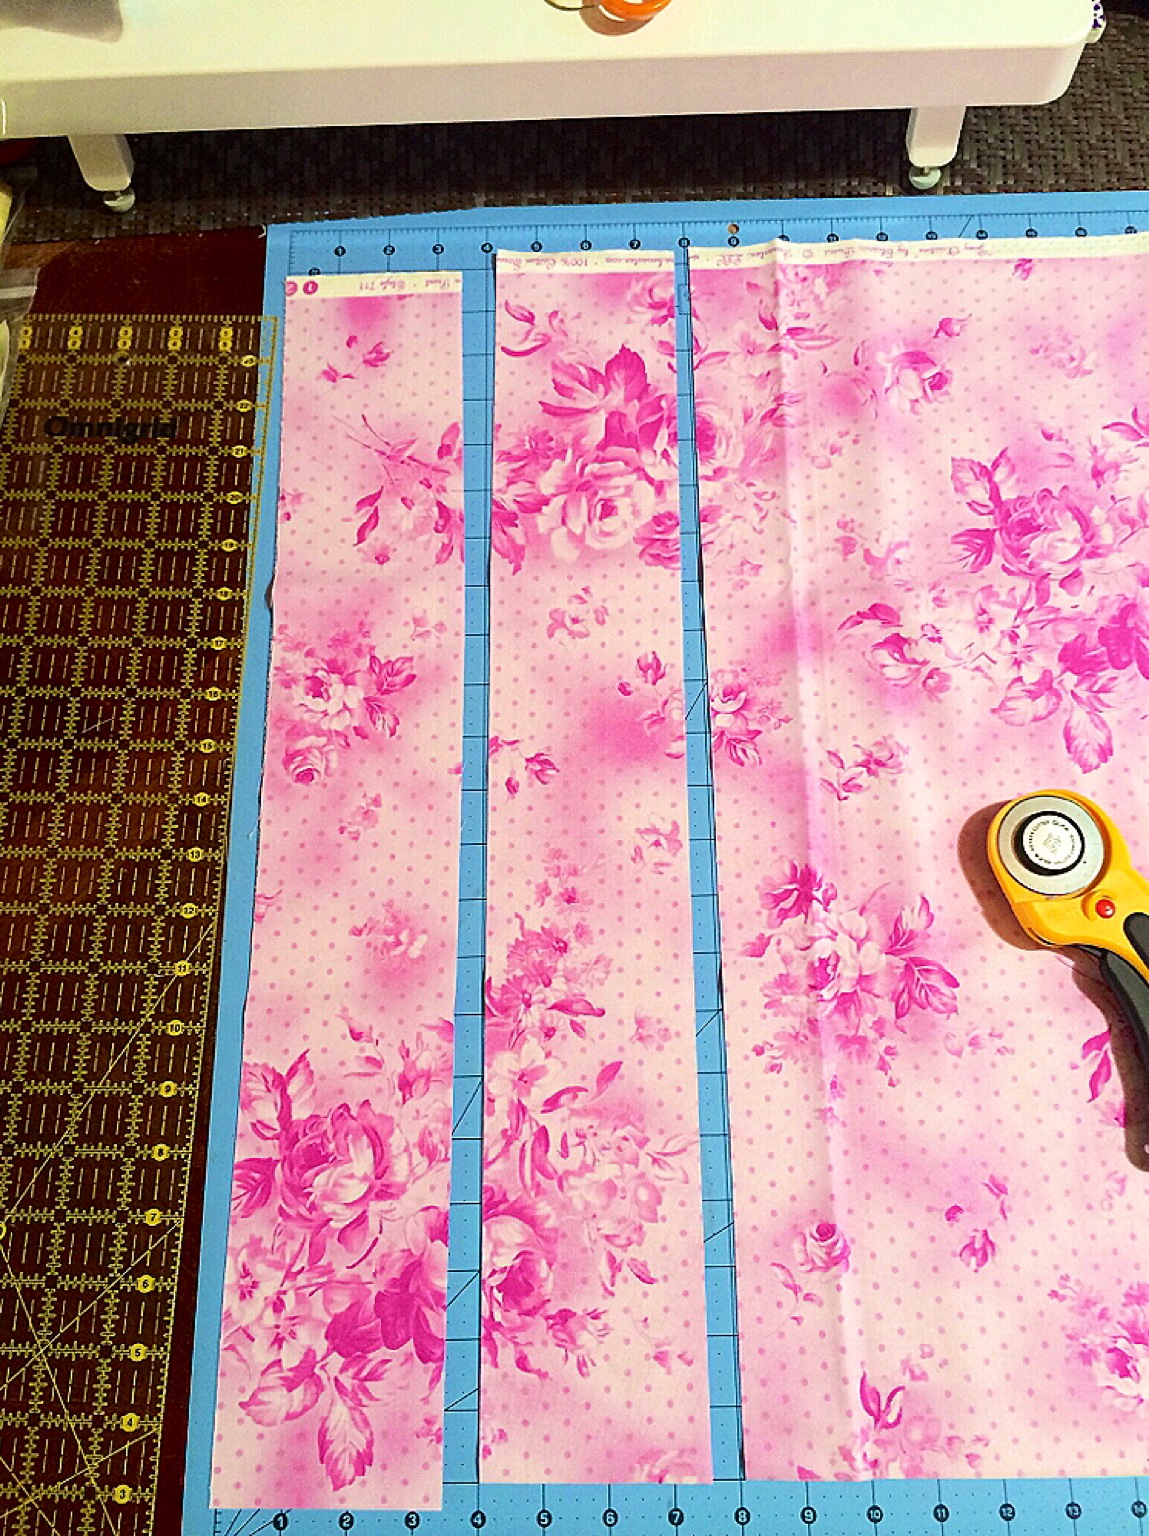
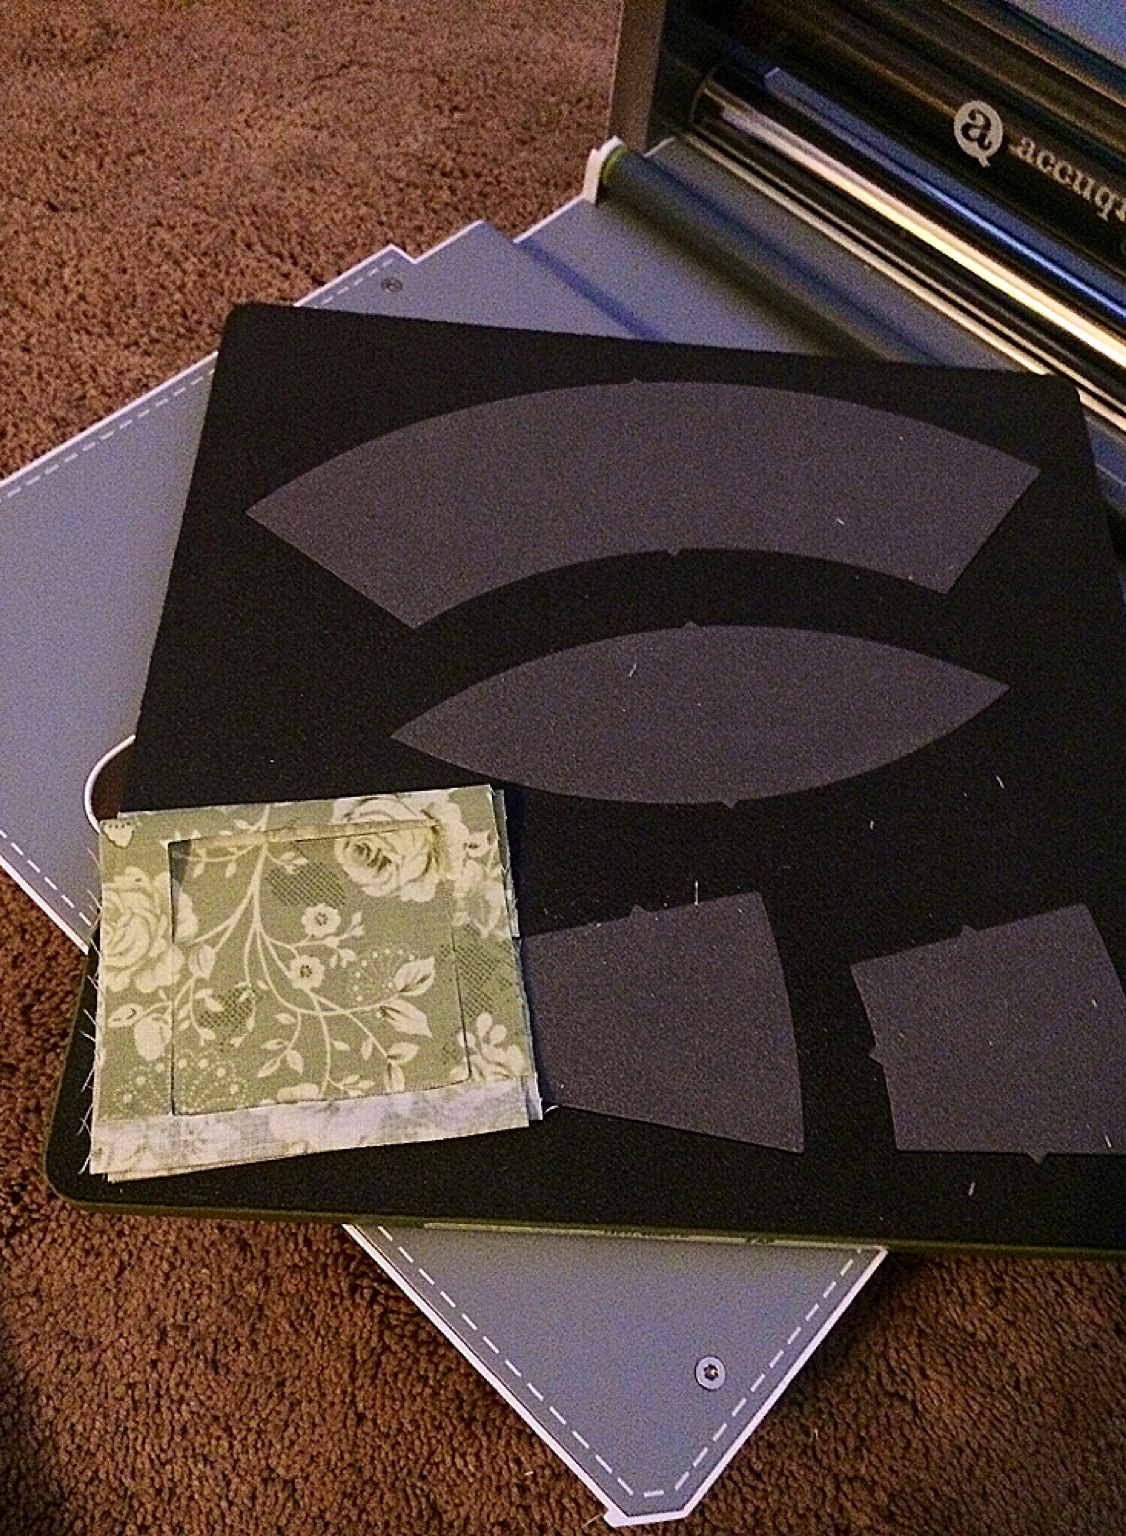
 I decided to fussy cut my centers with these beautiful floral prints.
Fussy cutting makes my fabric look like Swiss cheese. But I love the end result of fussy cut pieces!
Do you like to fussy cut?
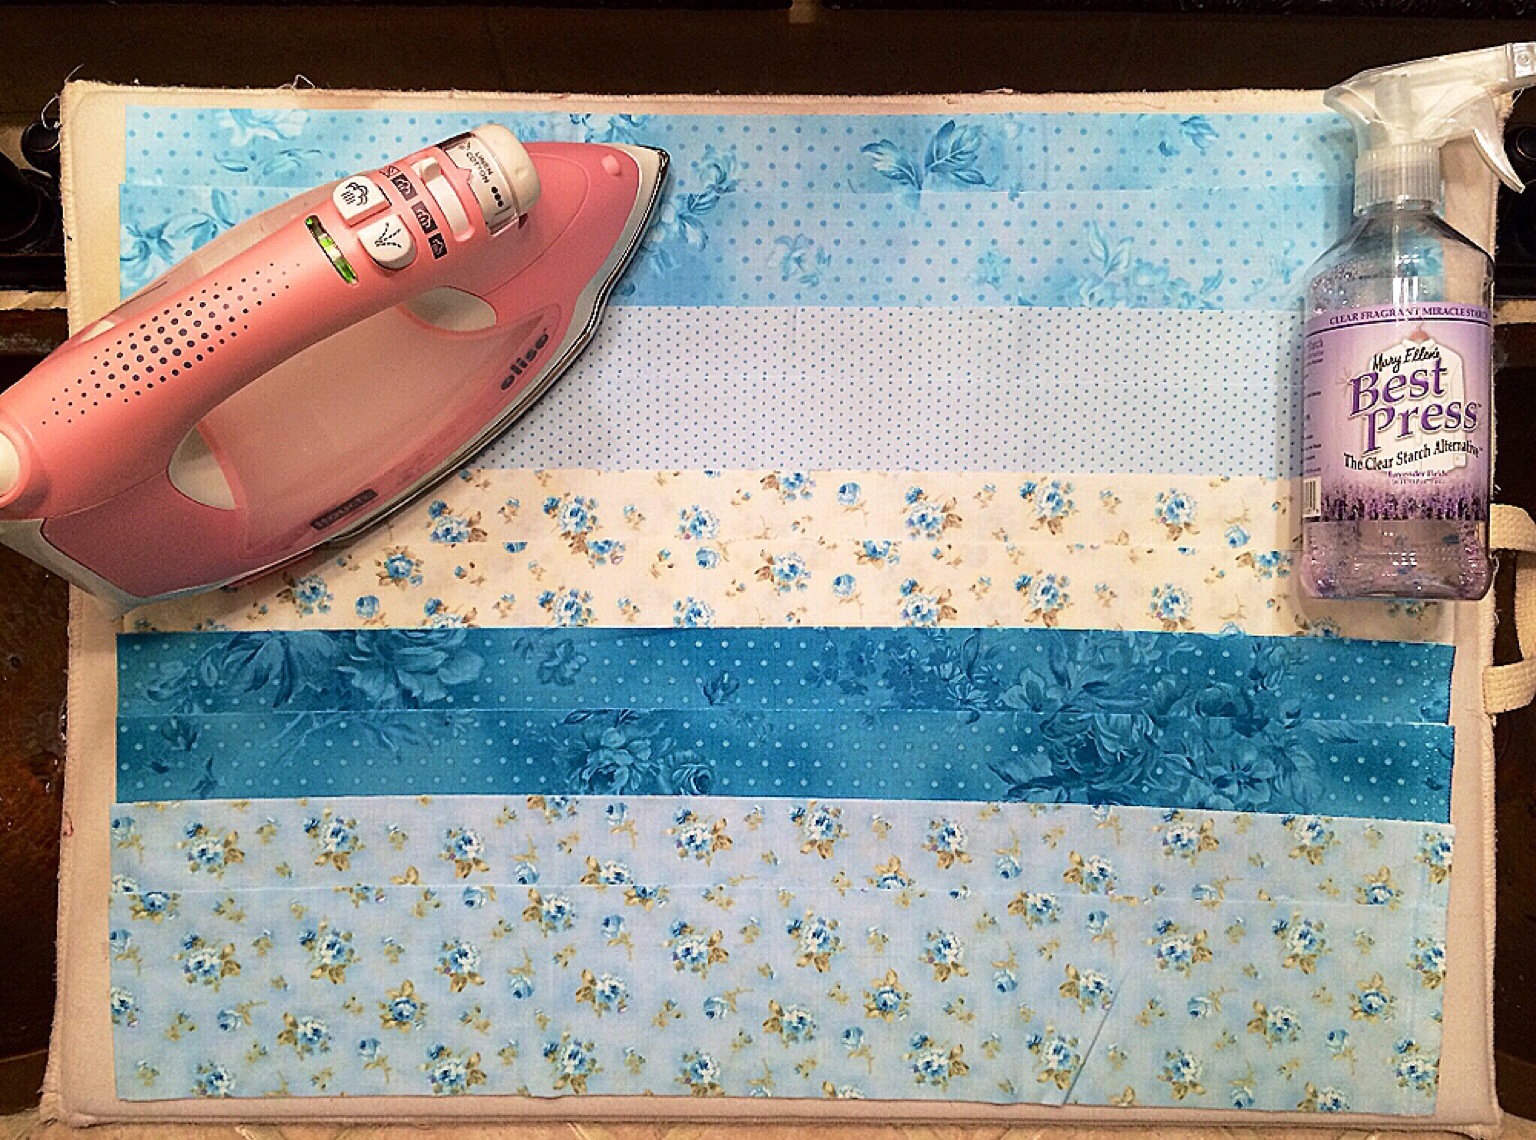
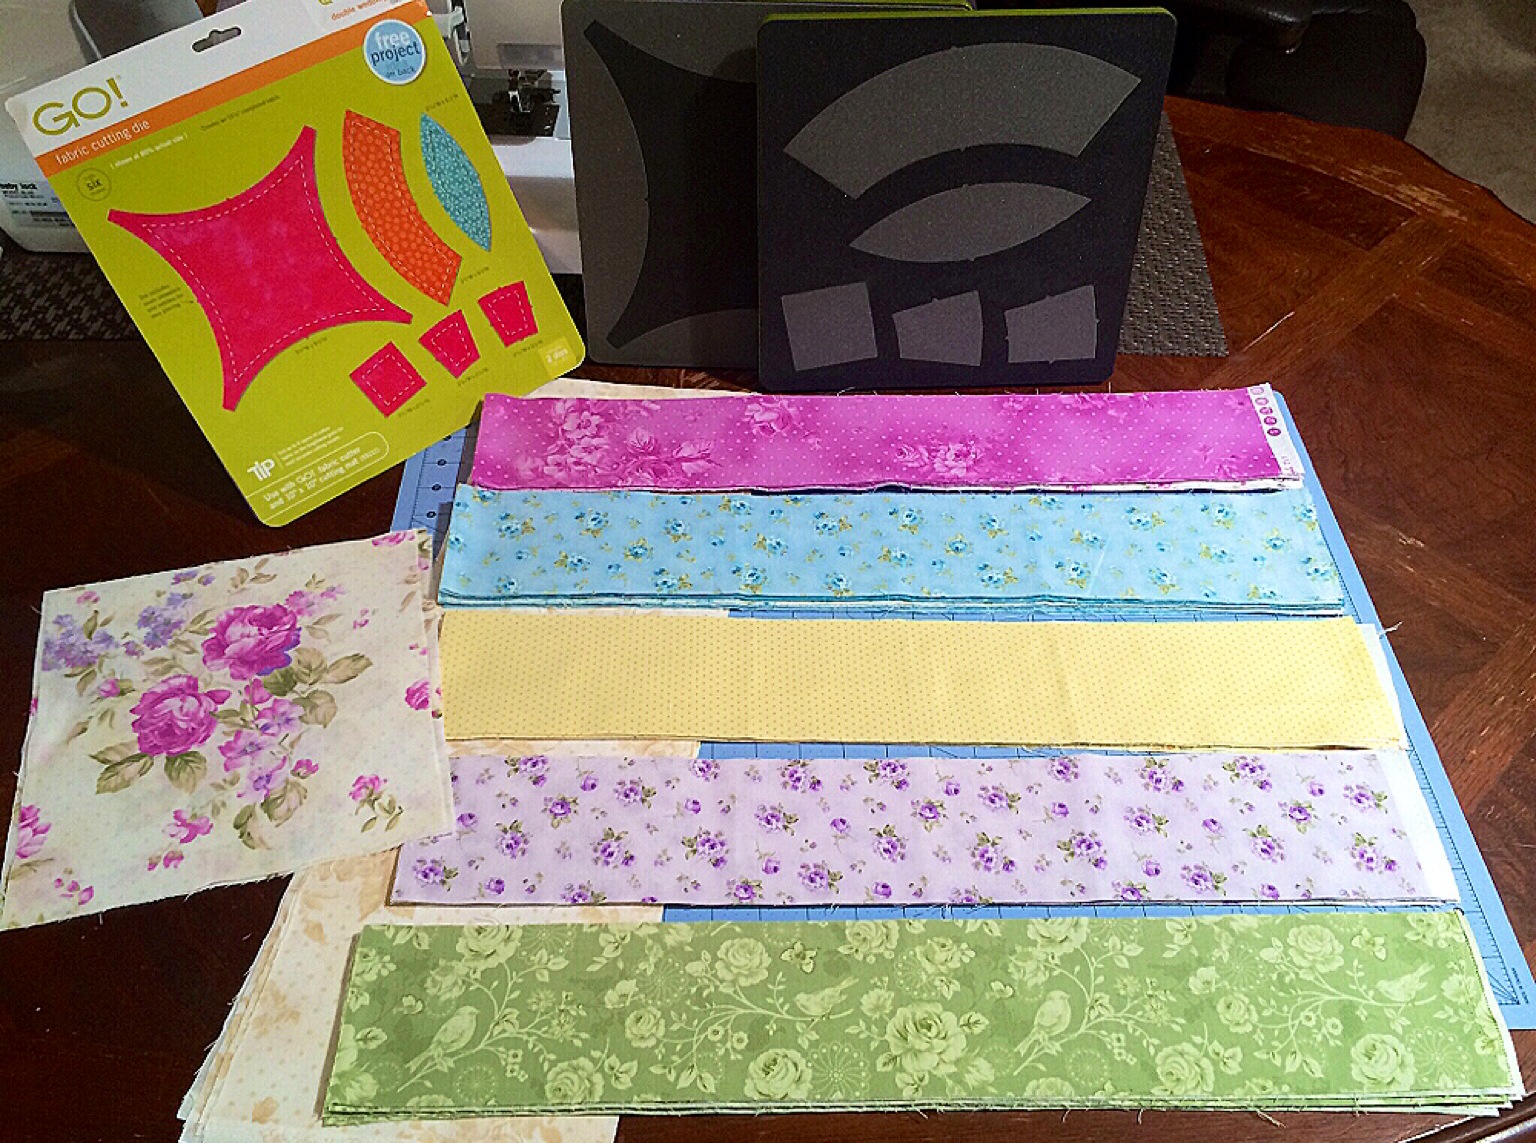
I got my fabric sorted and cut into strips.
Now if you’re anything like me, you’re strips will be starched with “Best Press” and all of your fabric will be covered in kitty hair! 😛
 This is the only picture that I took while I was cutting my fabric. I got carried away cranking my fabric through my cutter that by the time I was almost done, I has just thought of taking pictures for this blog hop.
The AccuQuilt cutter makes it so easy to cut fabric efficiently. All I had to do was cut my strips, fan fold them on the die and crank it through my AccuQuilt! These are the squares( Shape B) that I cut in seconds, with very minimal waste!

That’s it! I had all of my pieces cut in about ten minutes!
That really saved me from spending so much time cutting the pieces by hand, and I, who is prone to back pain, really appreciate that help. Thank you AccuQuilt!
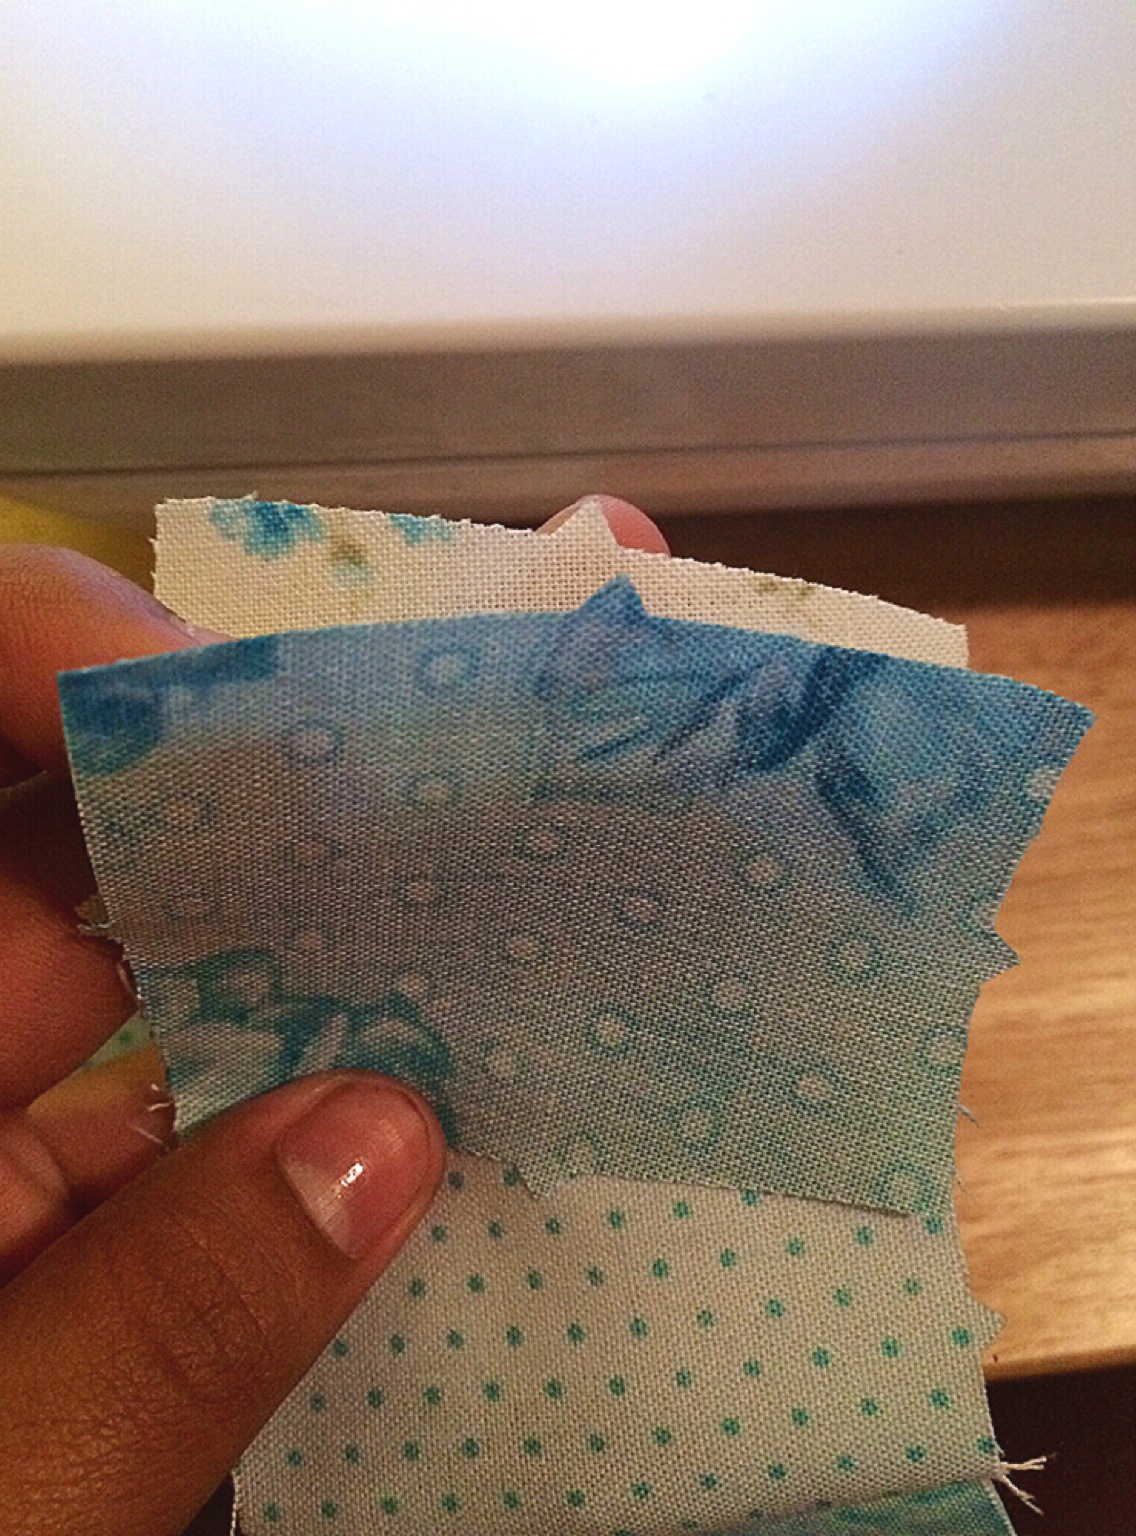

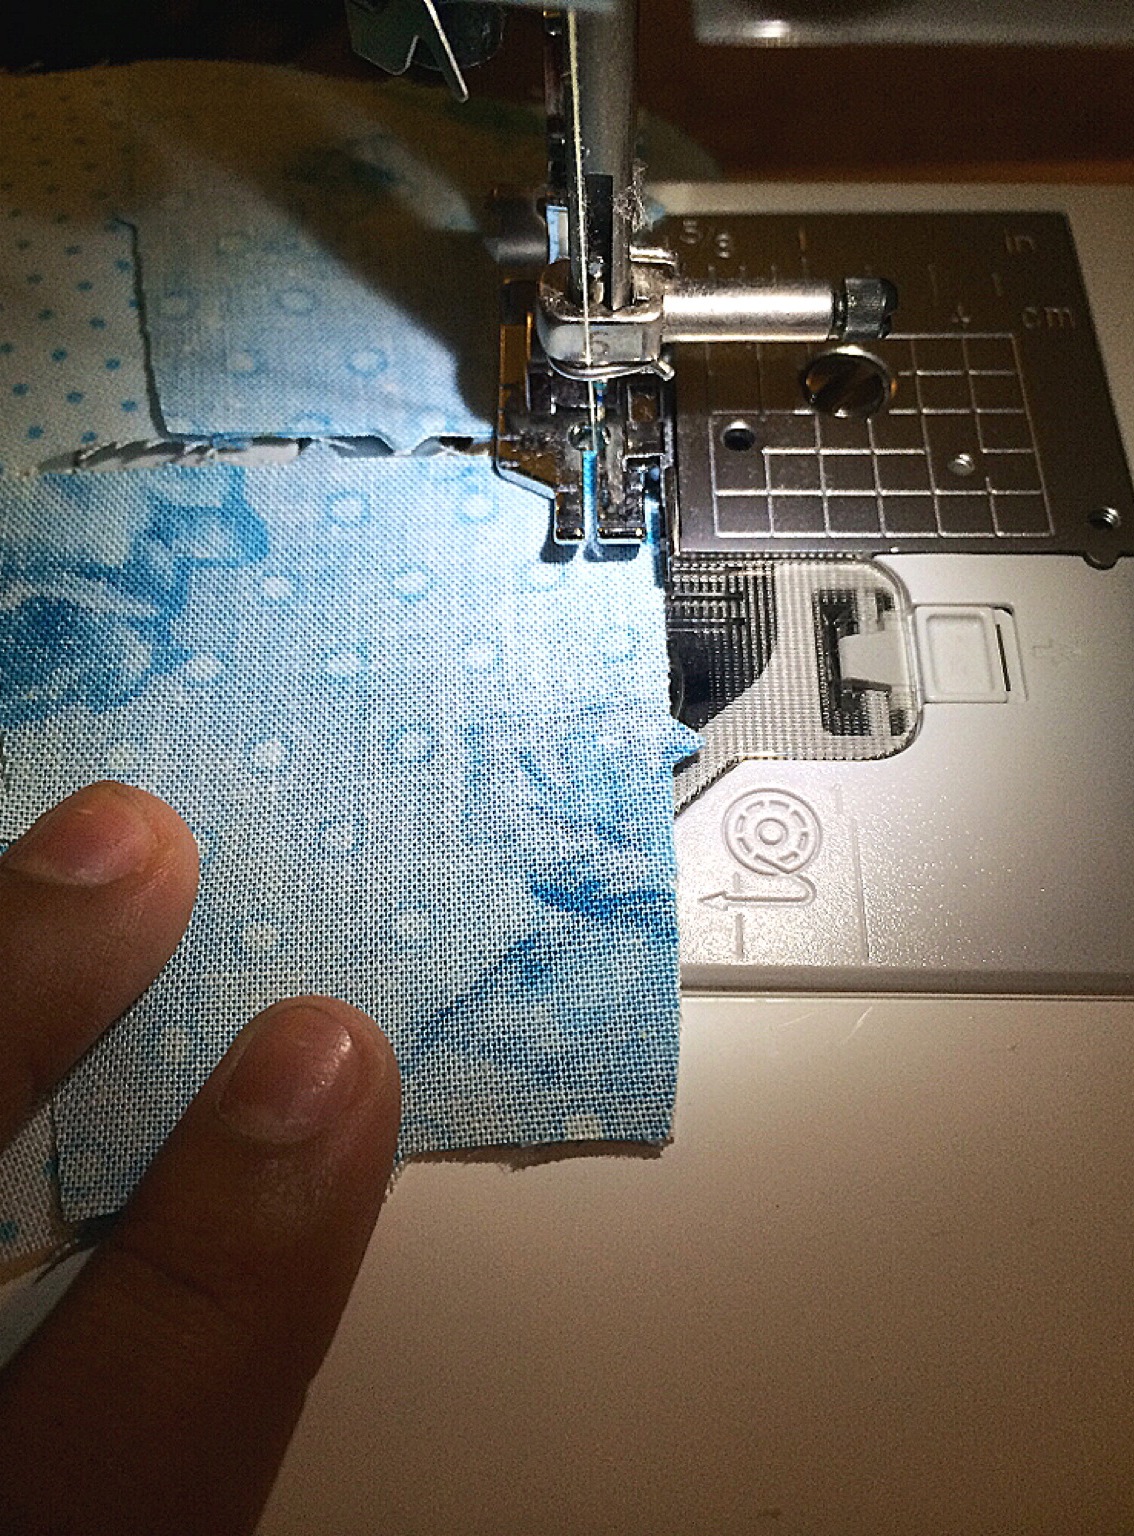
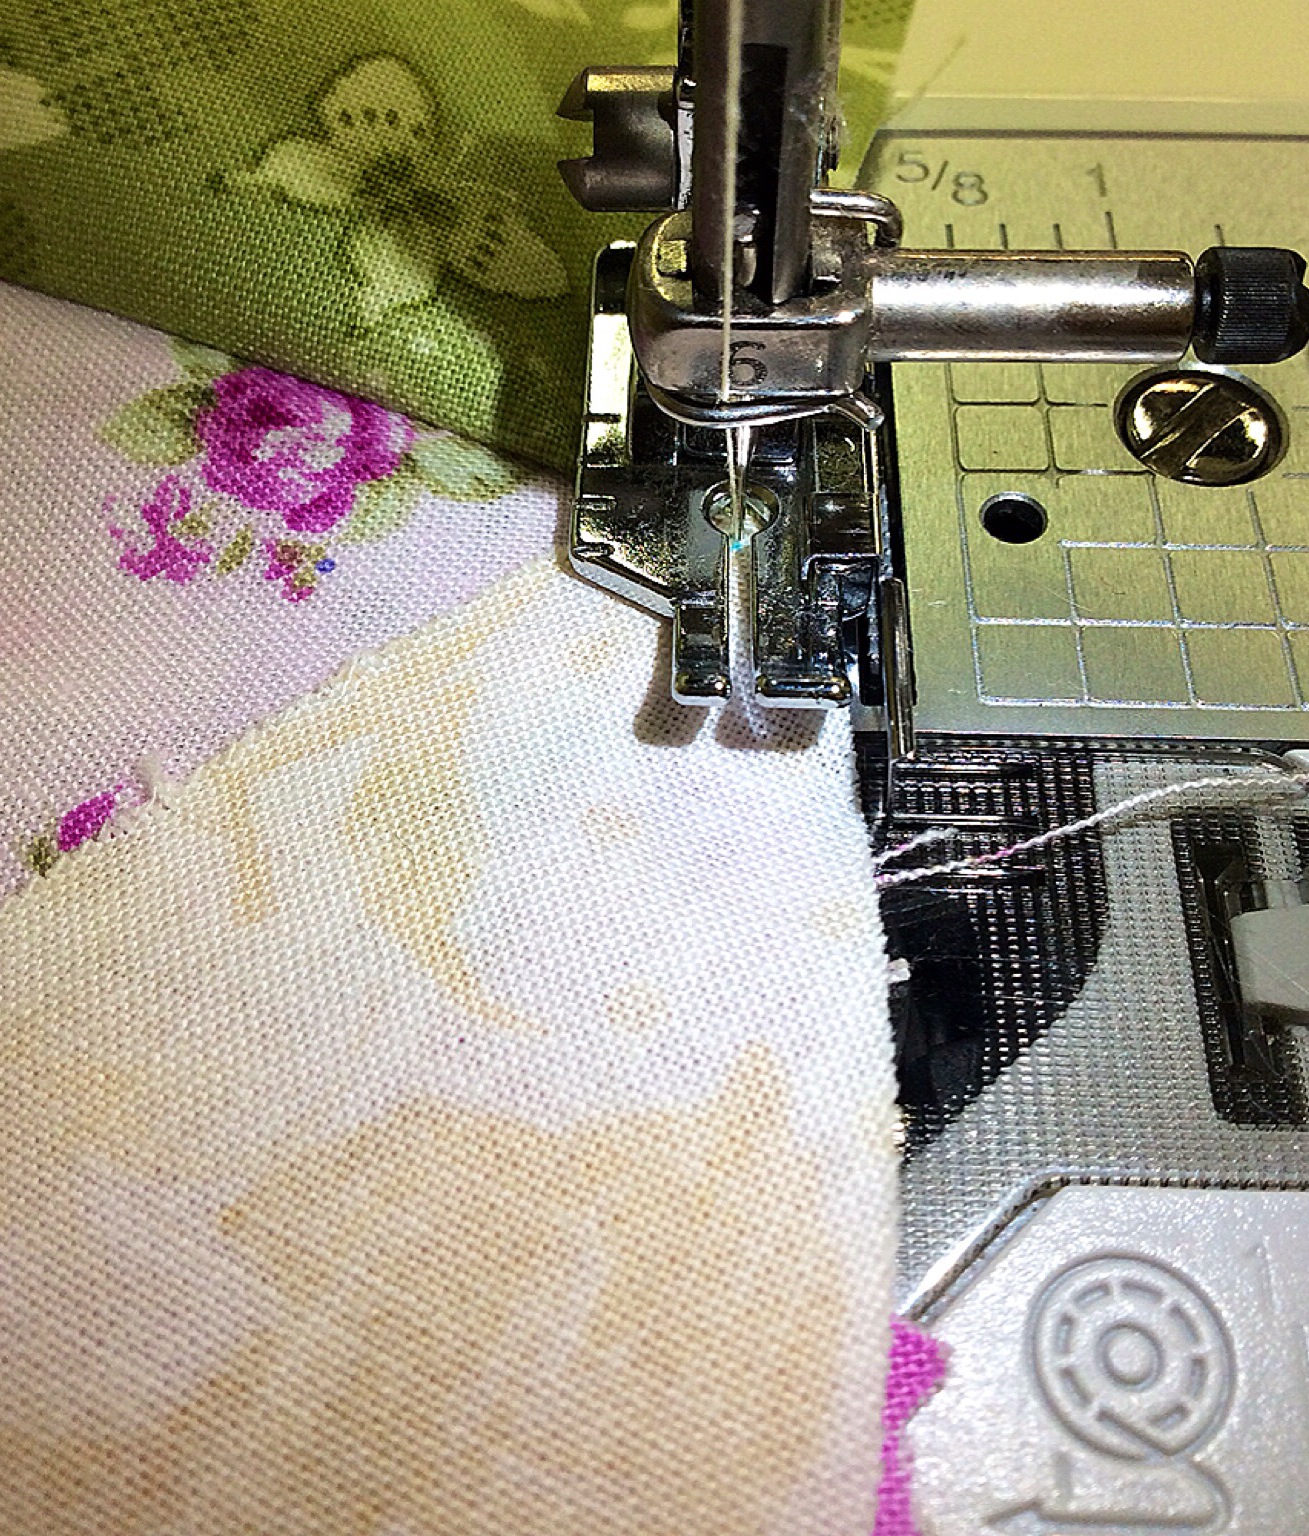
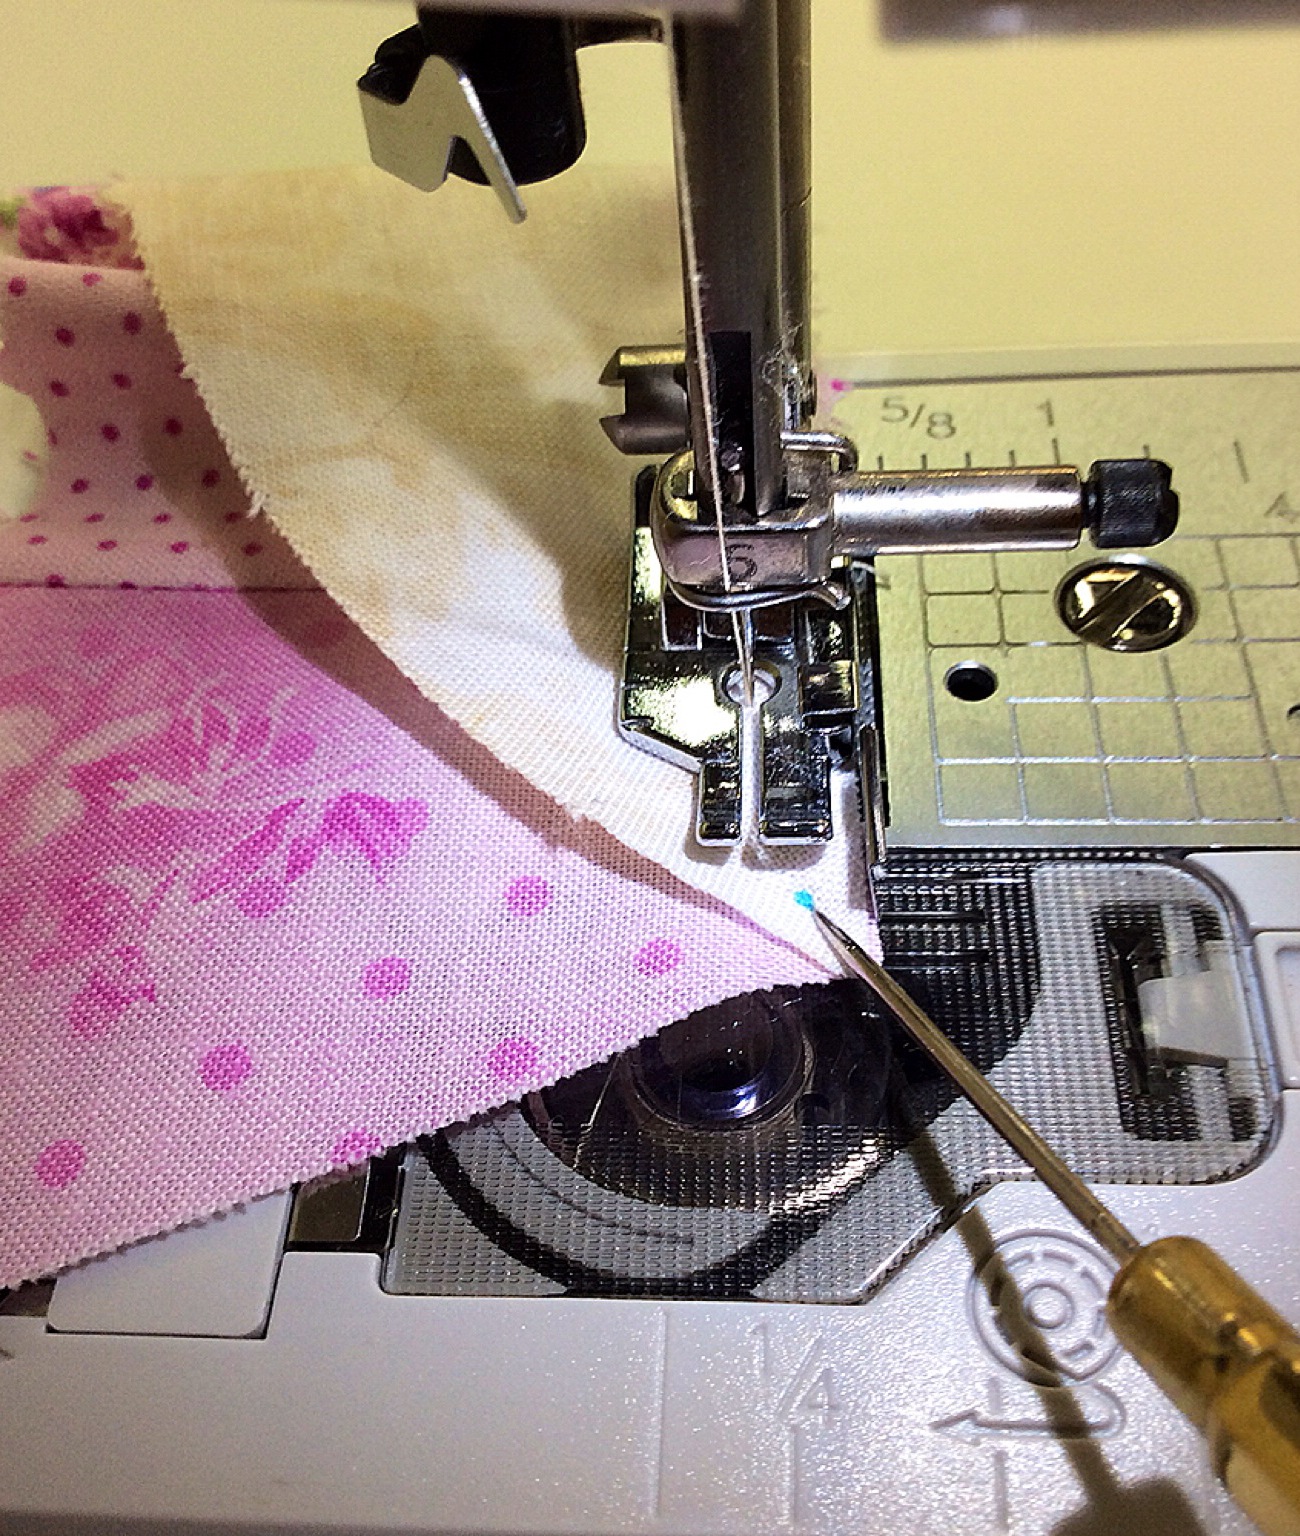
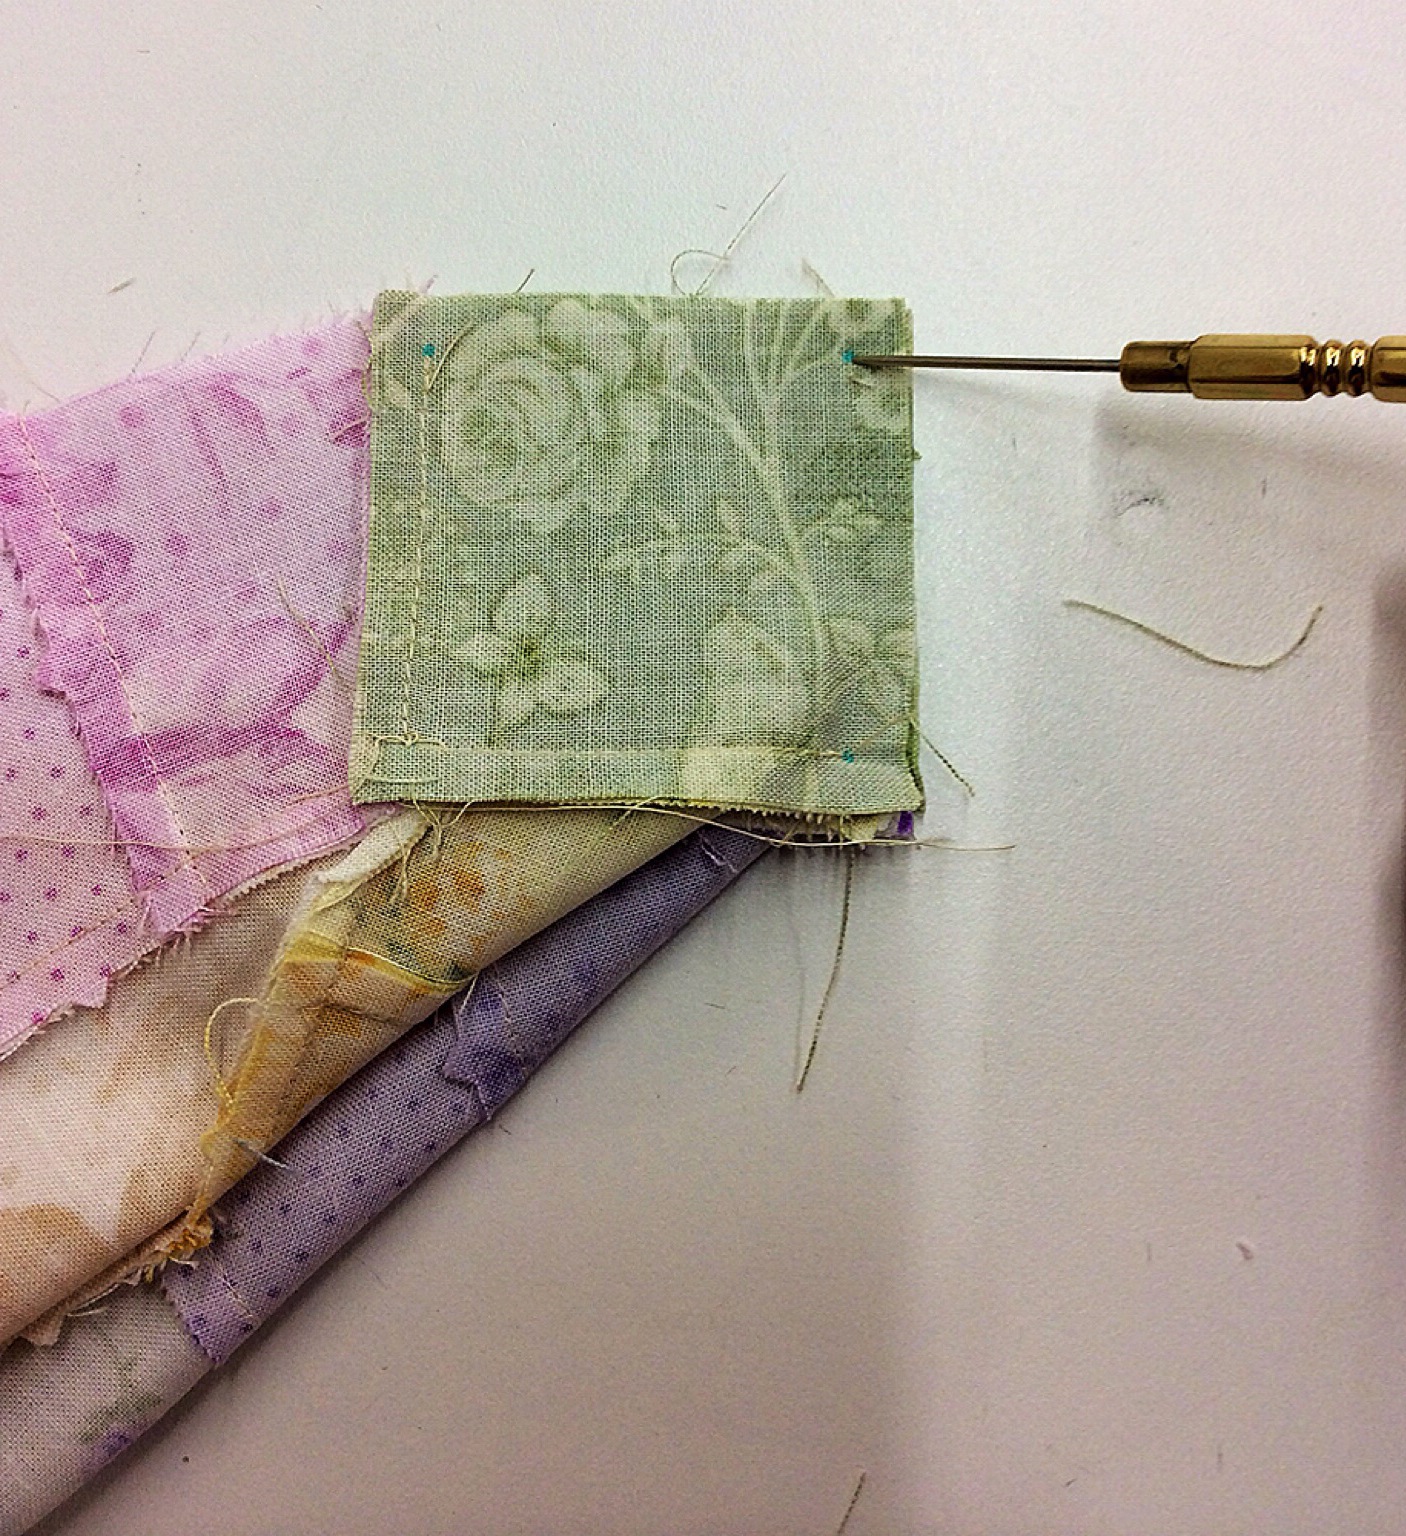
After I got all of my pieces cut, I used the engineered notches to line up my pieces and sew a perfect quarter inch seam.
These little notches are on almost every single die that AccuQuilt makes, along with “trimmed” doggy ears on the half square triangles and edges. It’s such a neat feature and saves so MUCH time while and after you sew your pieces together. No more trimming those tips off of your blocks!

I chain pieced my arches and got them done in a flash!
Time to add the squares on the ends.

This die does call for Y-seams, but it is so easy!
I was intimidated by Y-seams, specially because the end product depends heavily on the accuracy of how you cut your fabric.
And AccuQuilt has made it possible to cut my fabric perfectly EVERY TIME, setting me up for success every time!
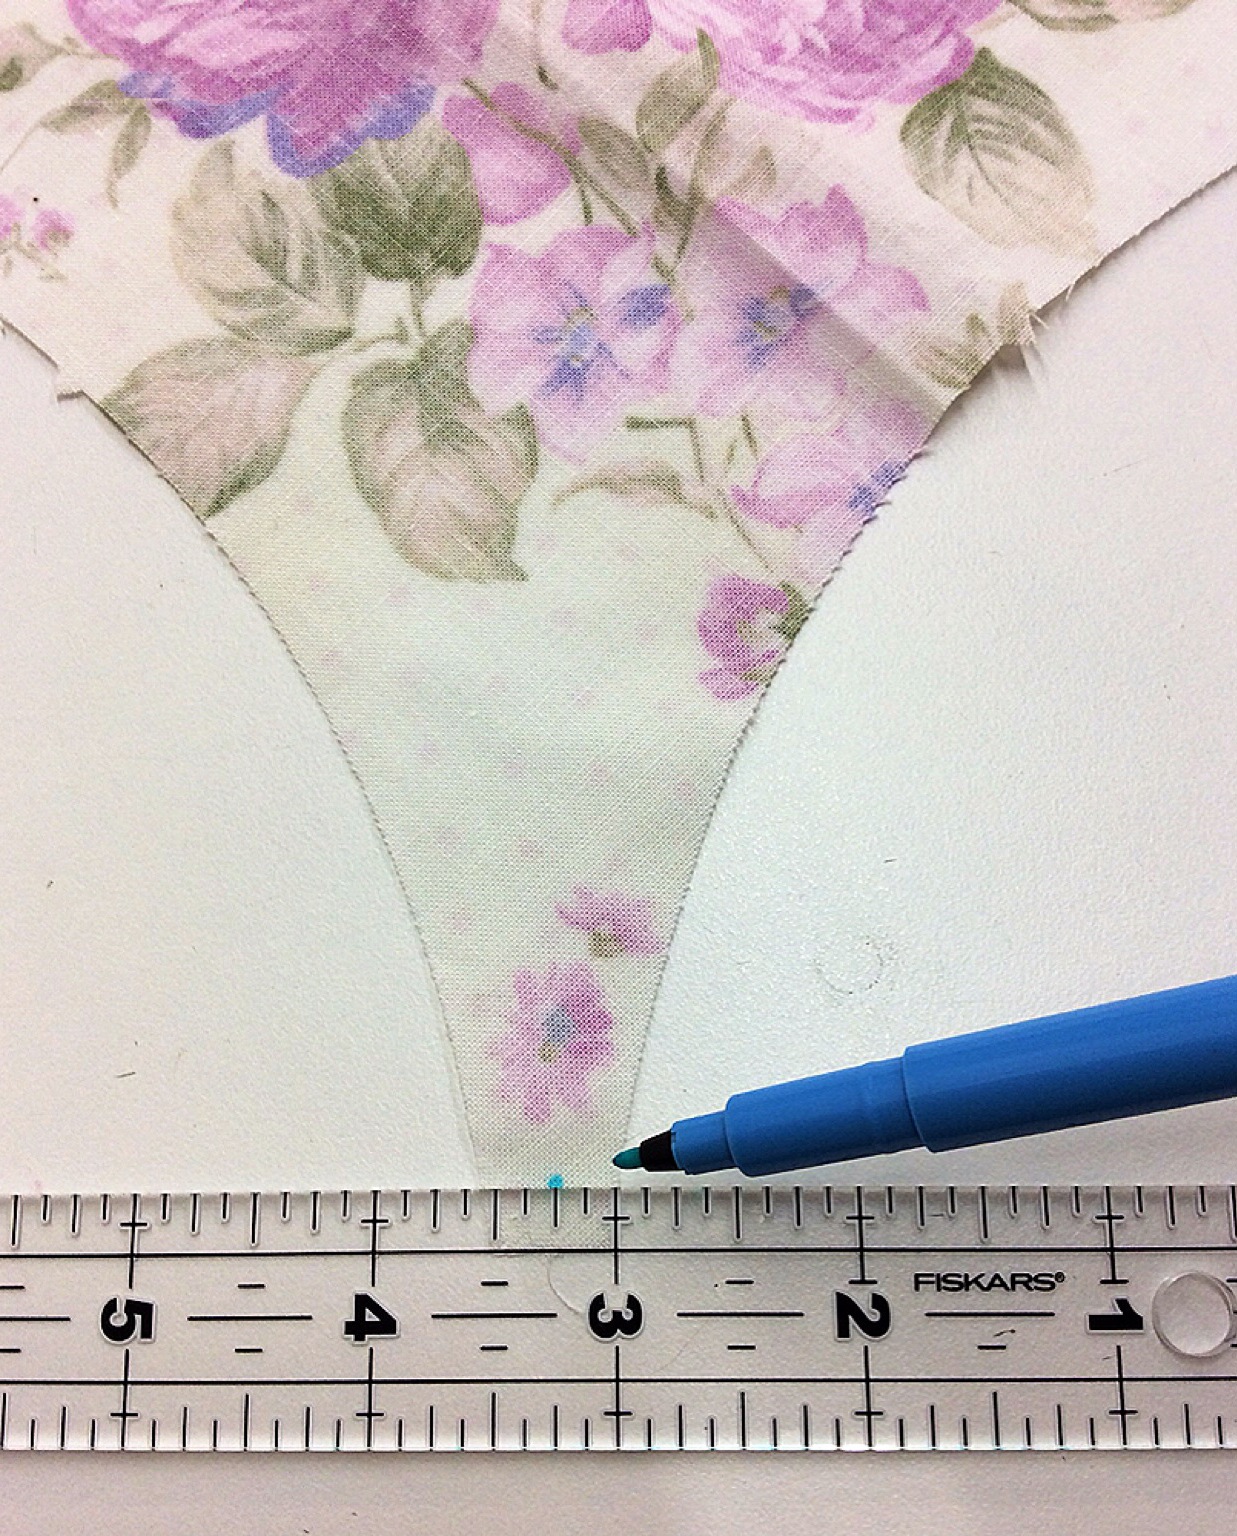
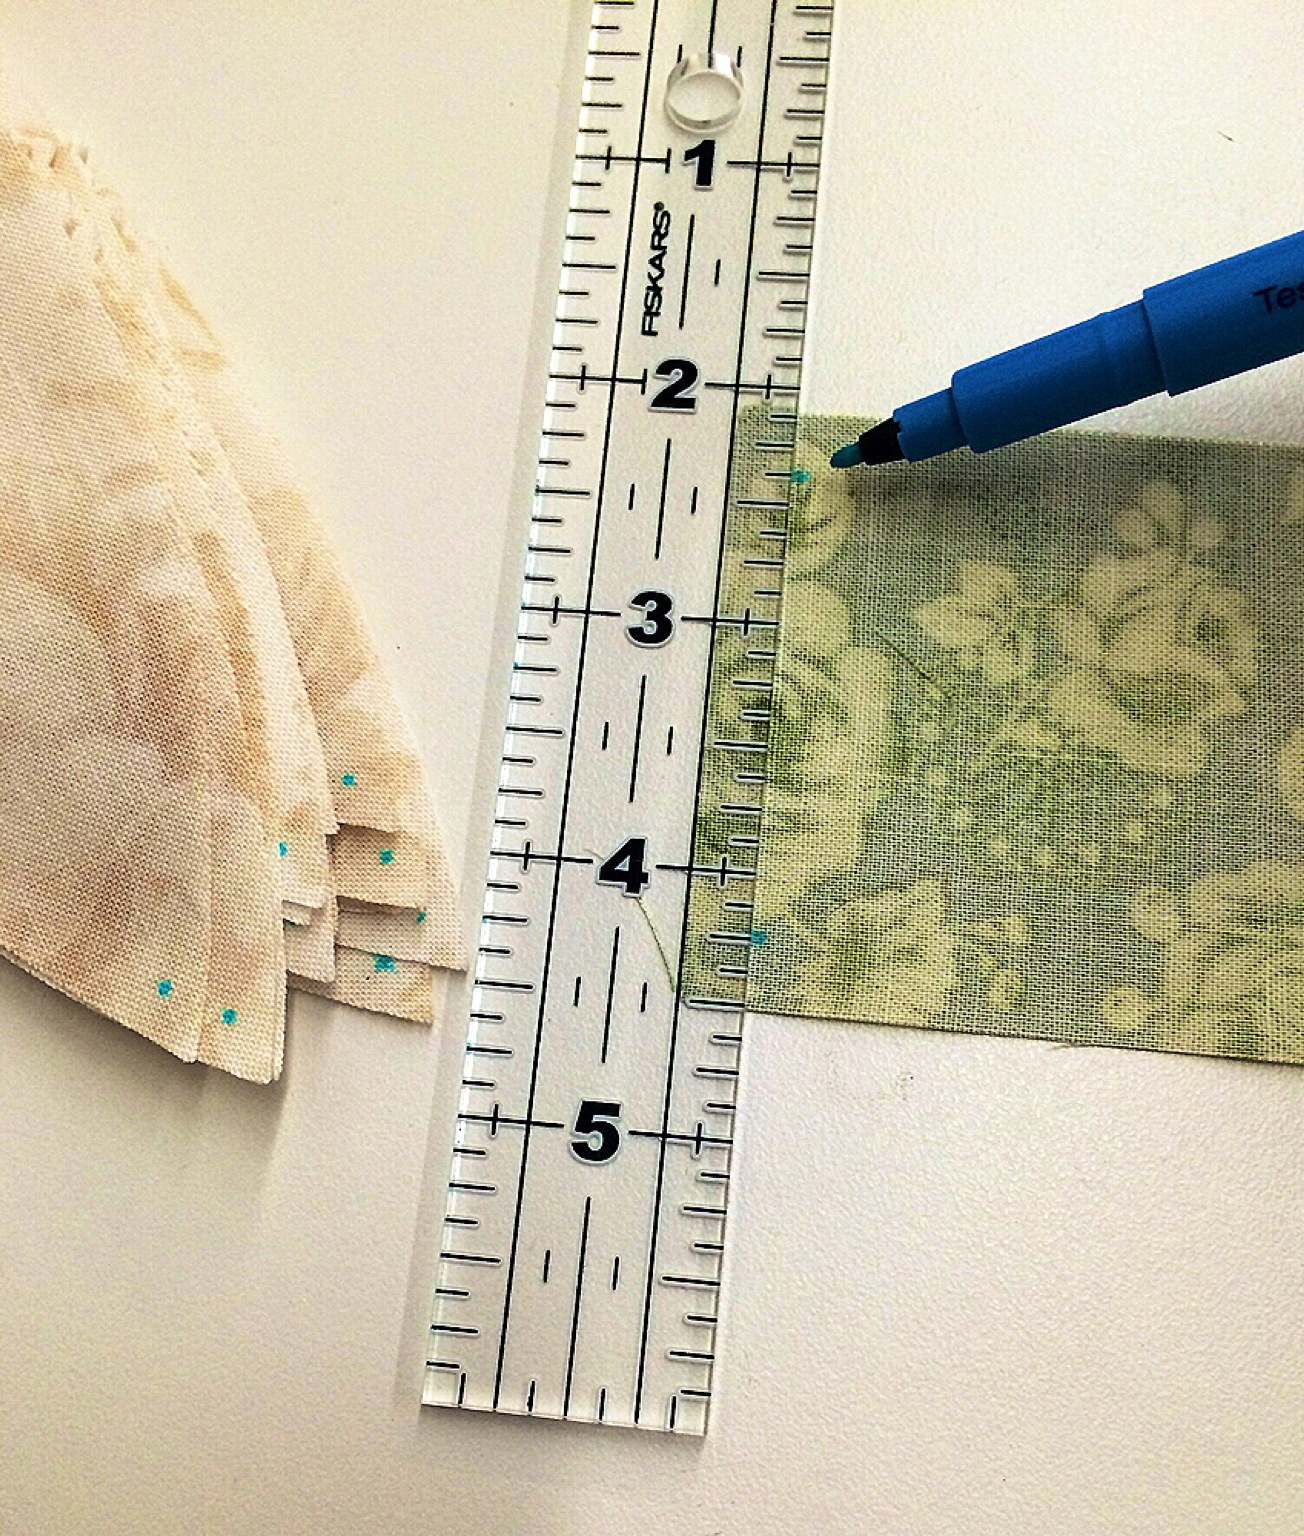
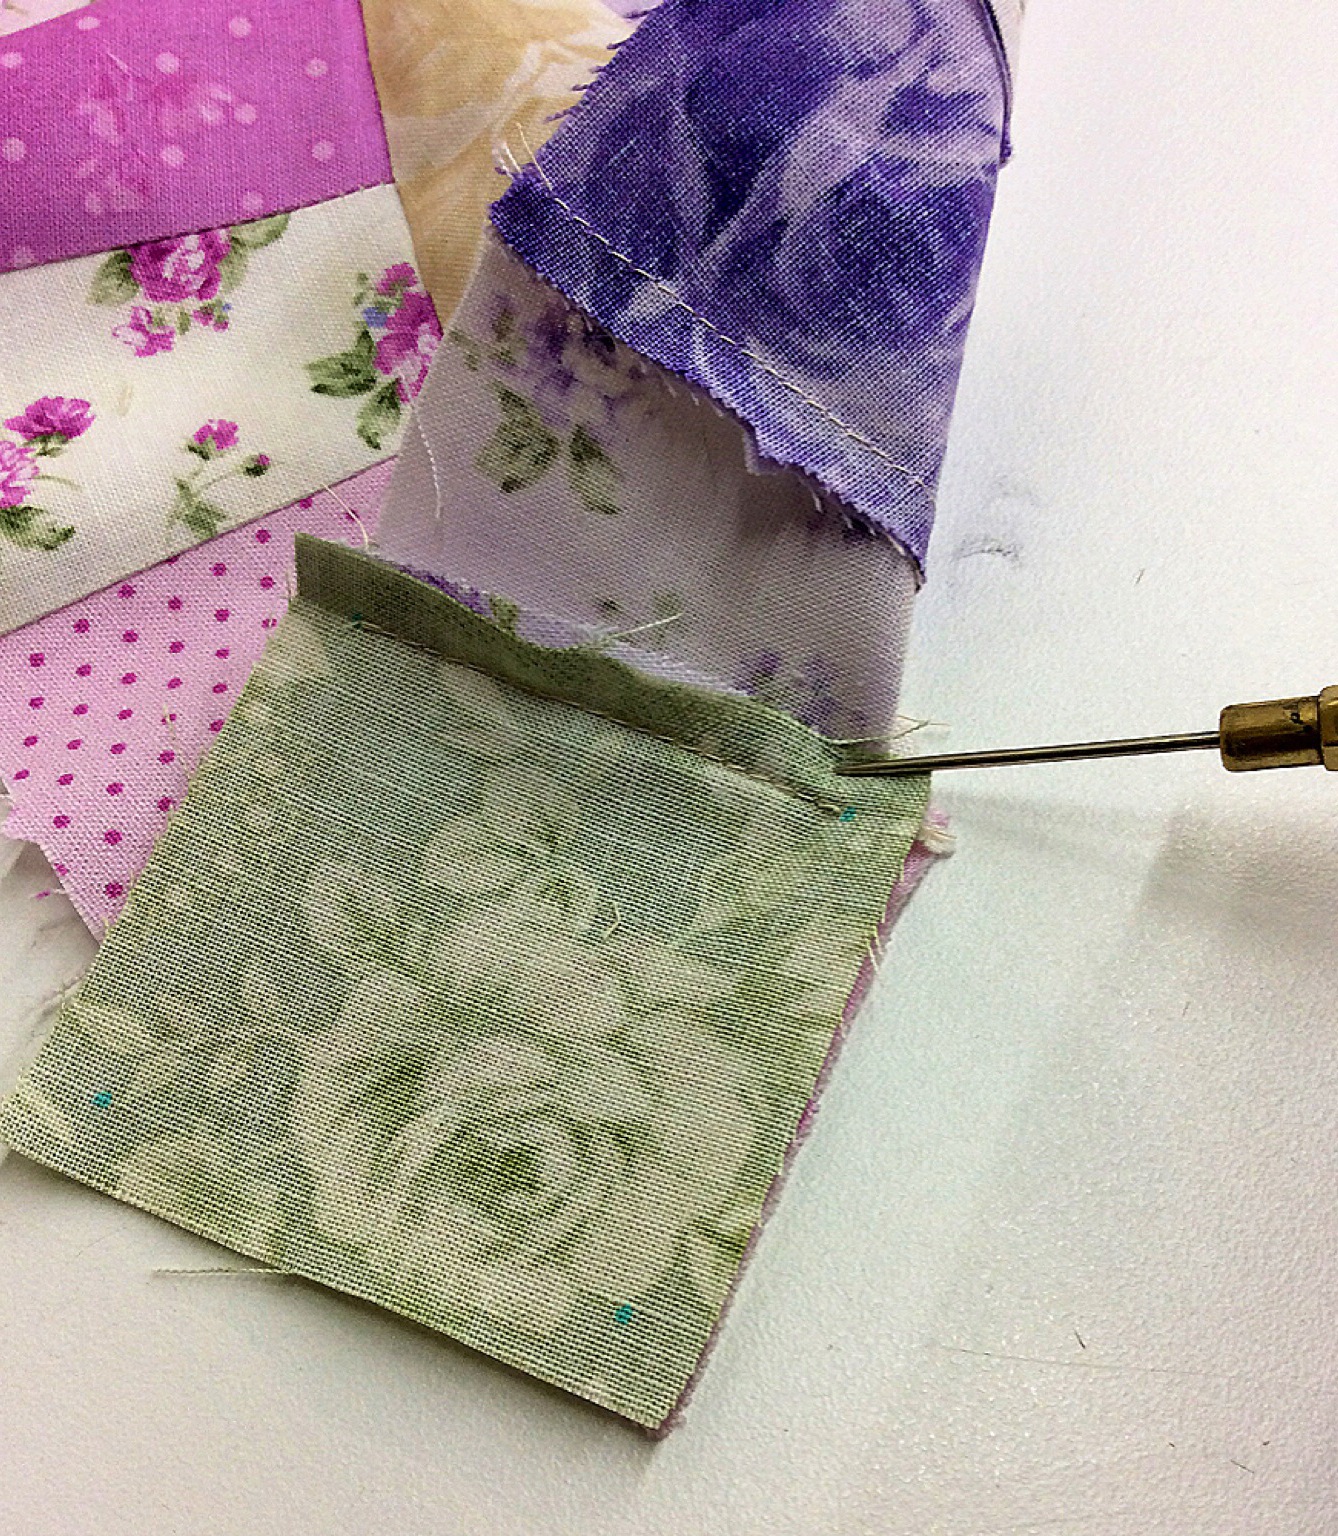
I marked 1/4″ points on the corners of my squares, on the ends of my “footballs” and on the “feet” of the center piece. These marks helped guide me when I sewed them onto my other pieces.

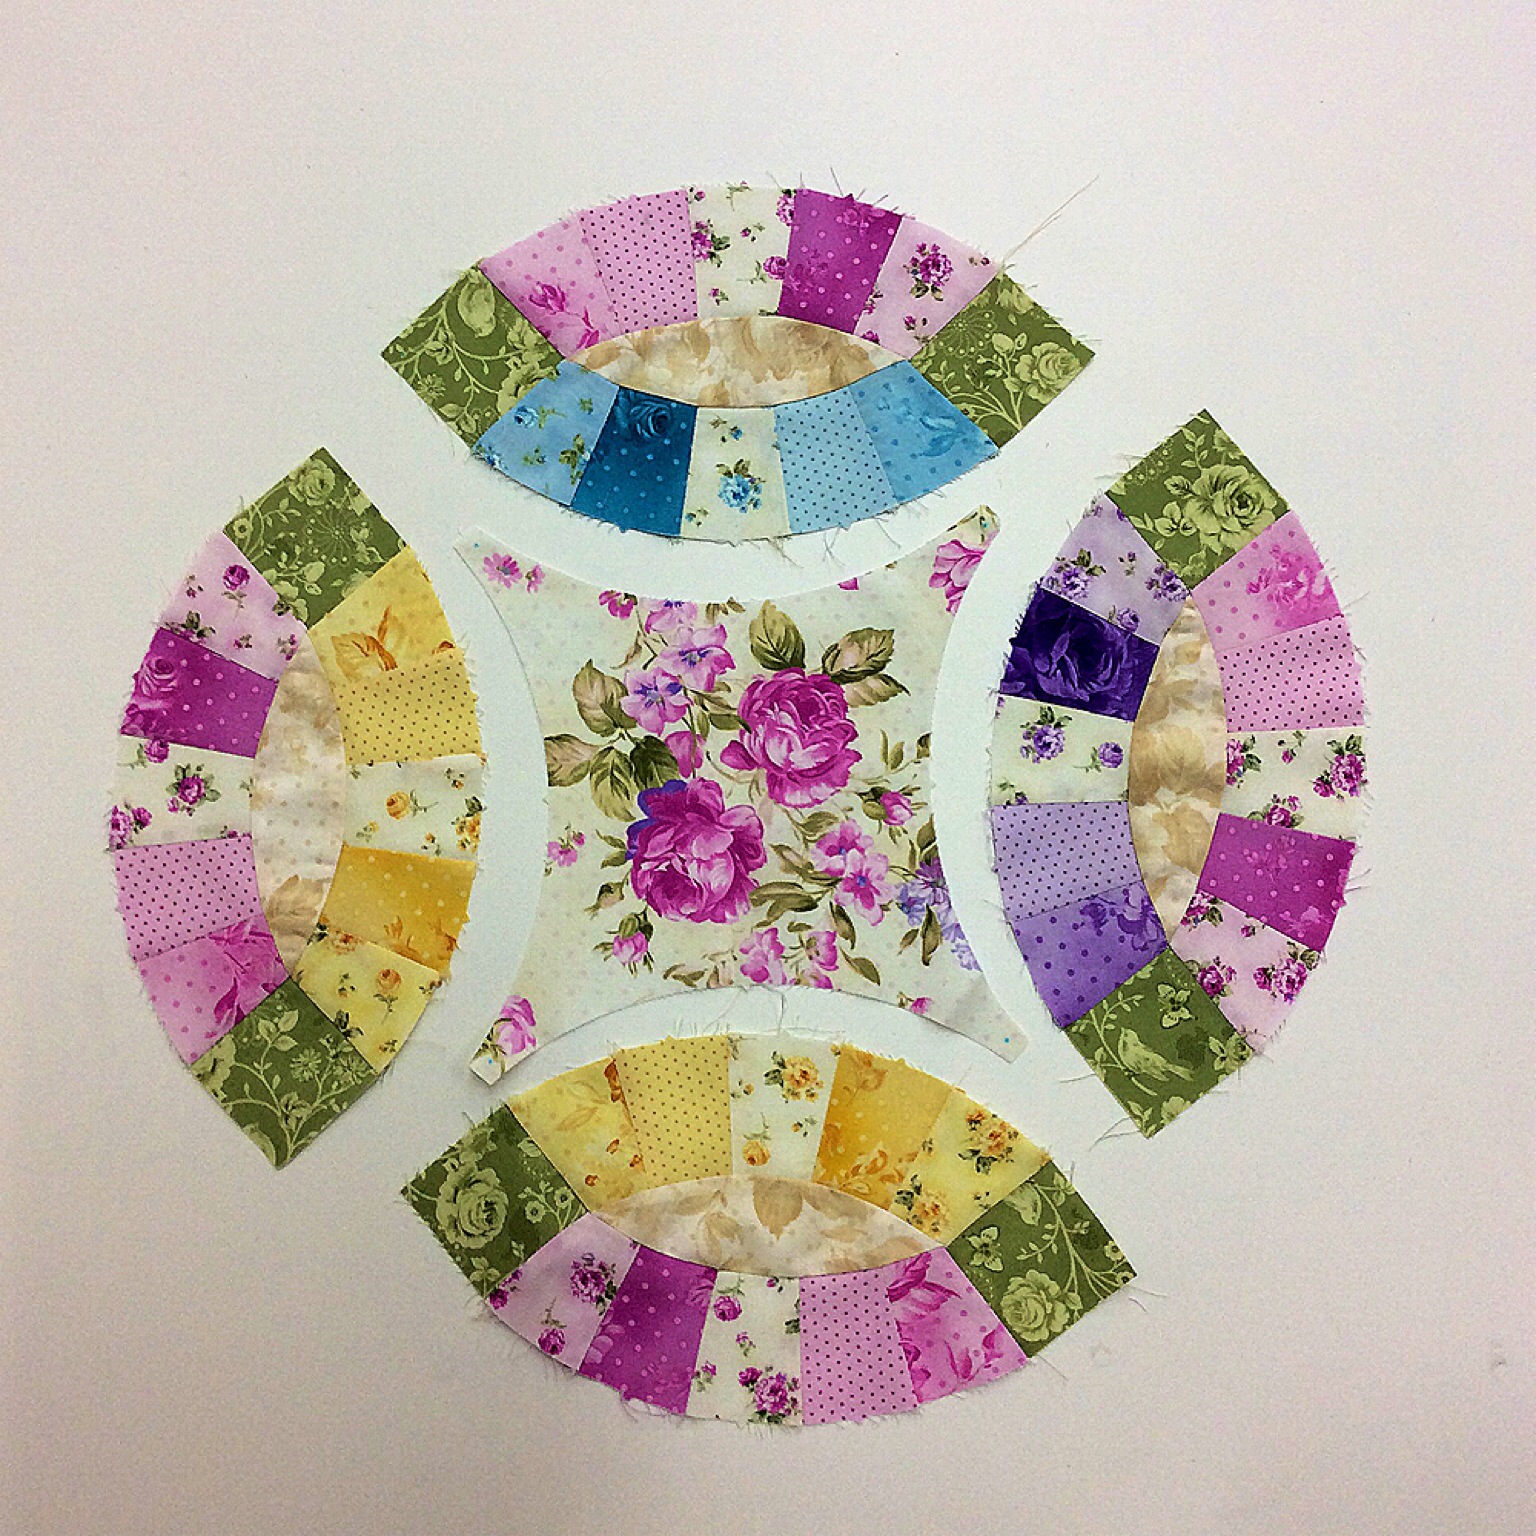
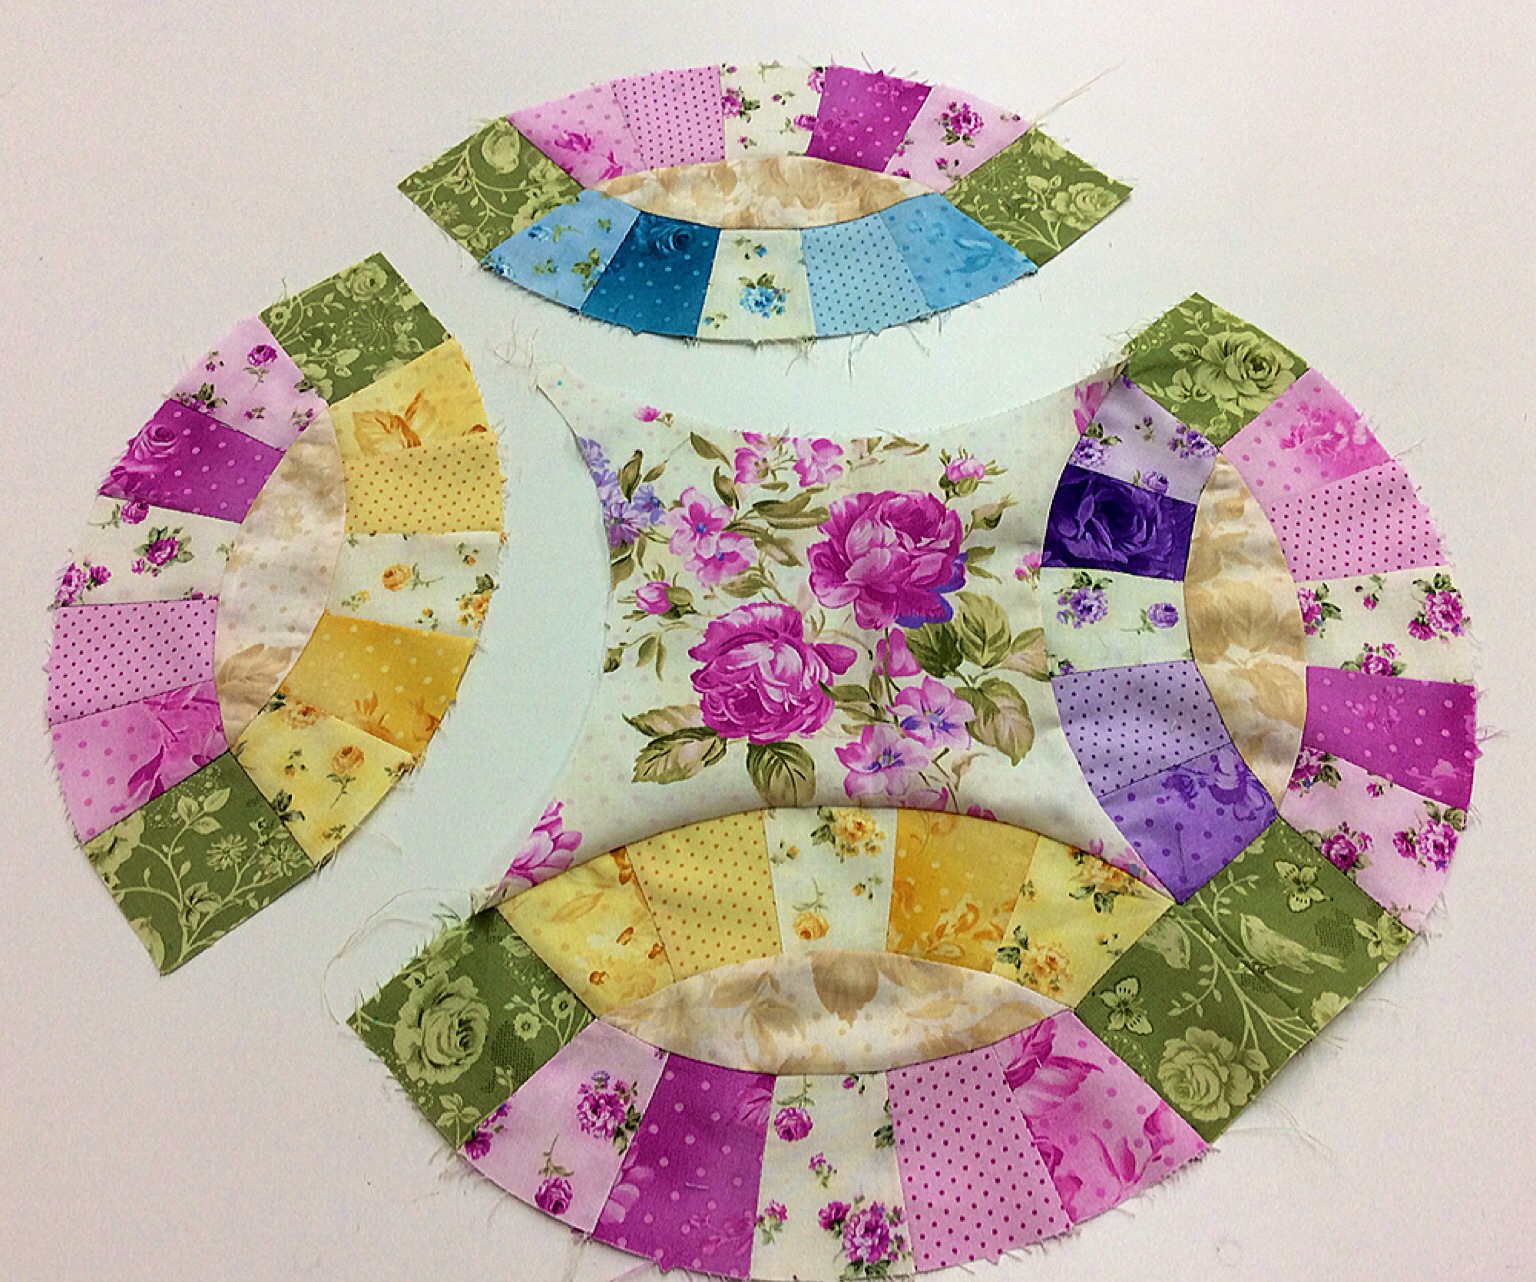
I laid out my rings and pieces to start sewing them together.

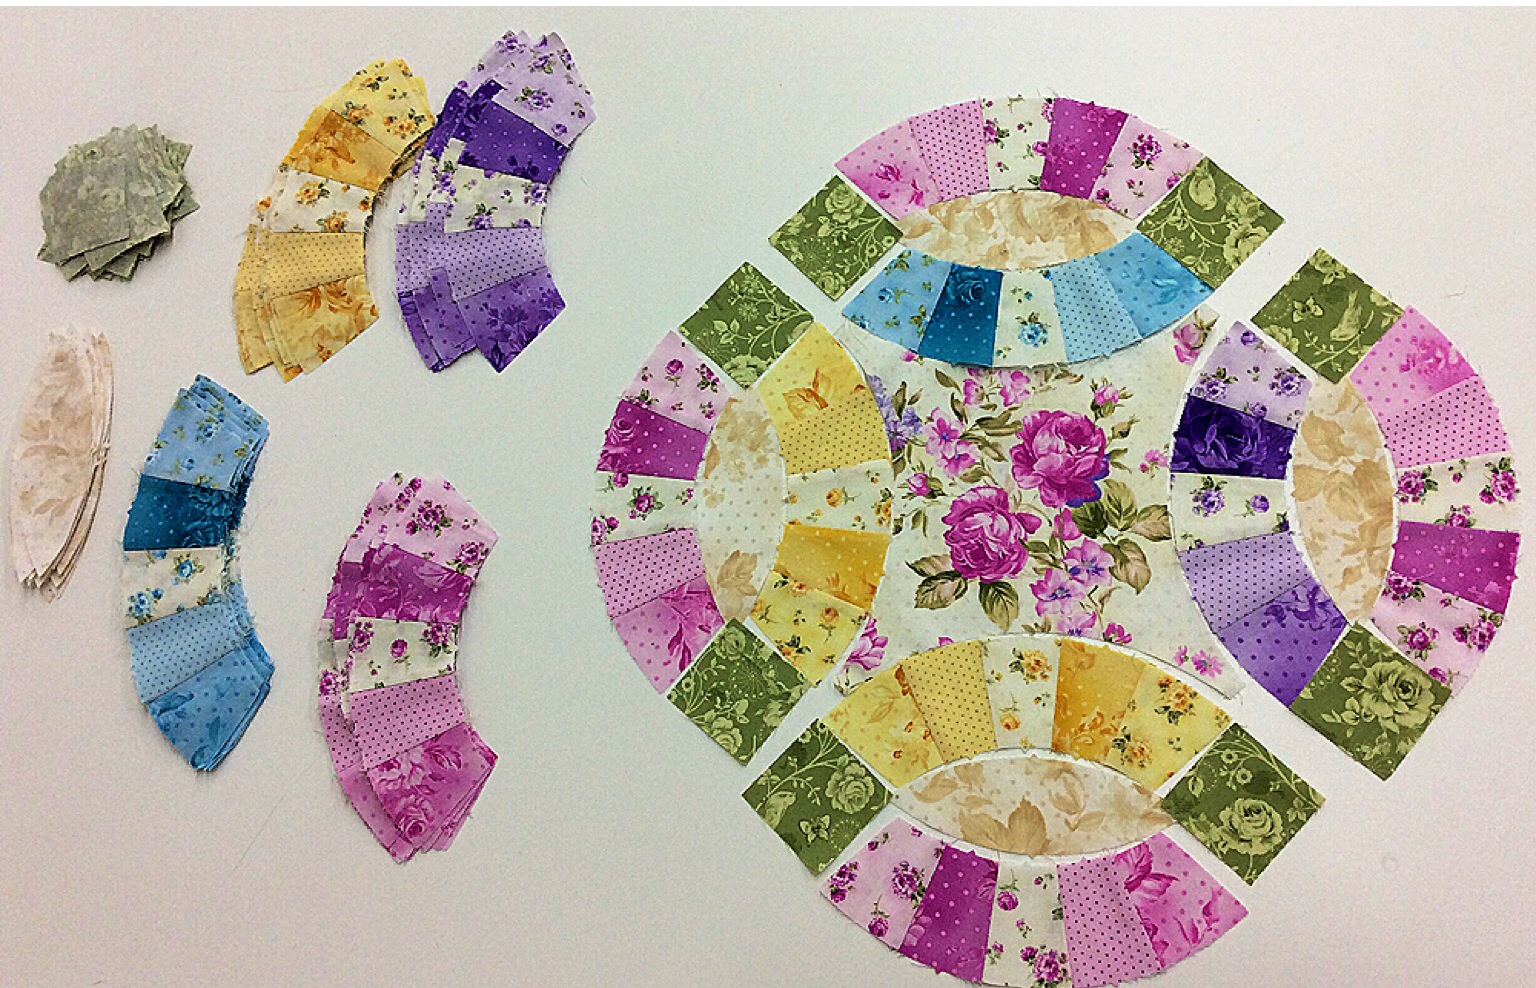
Now that I know which rings belong to what centers, I got ready to start sewing them together!
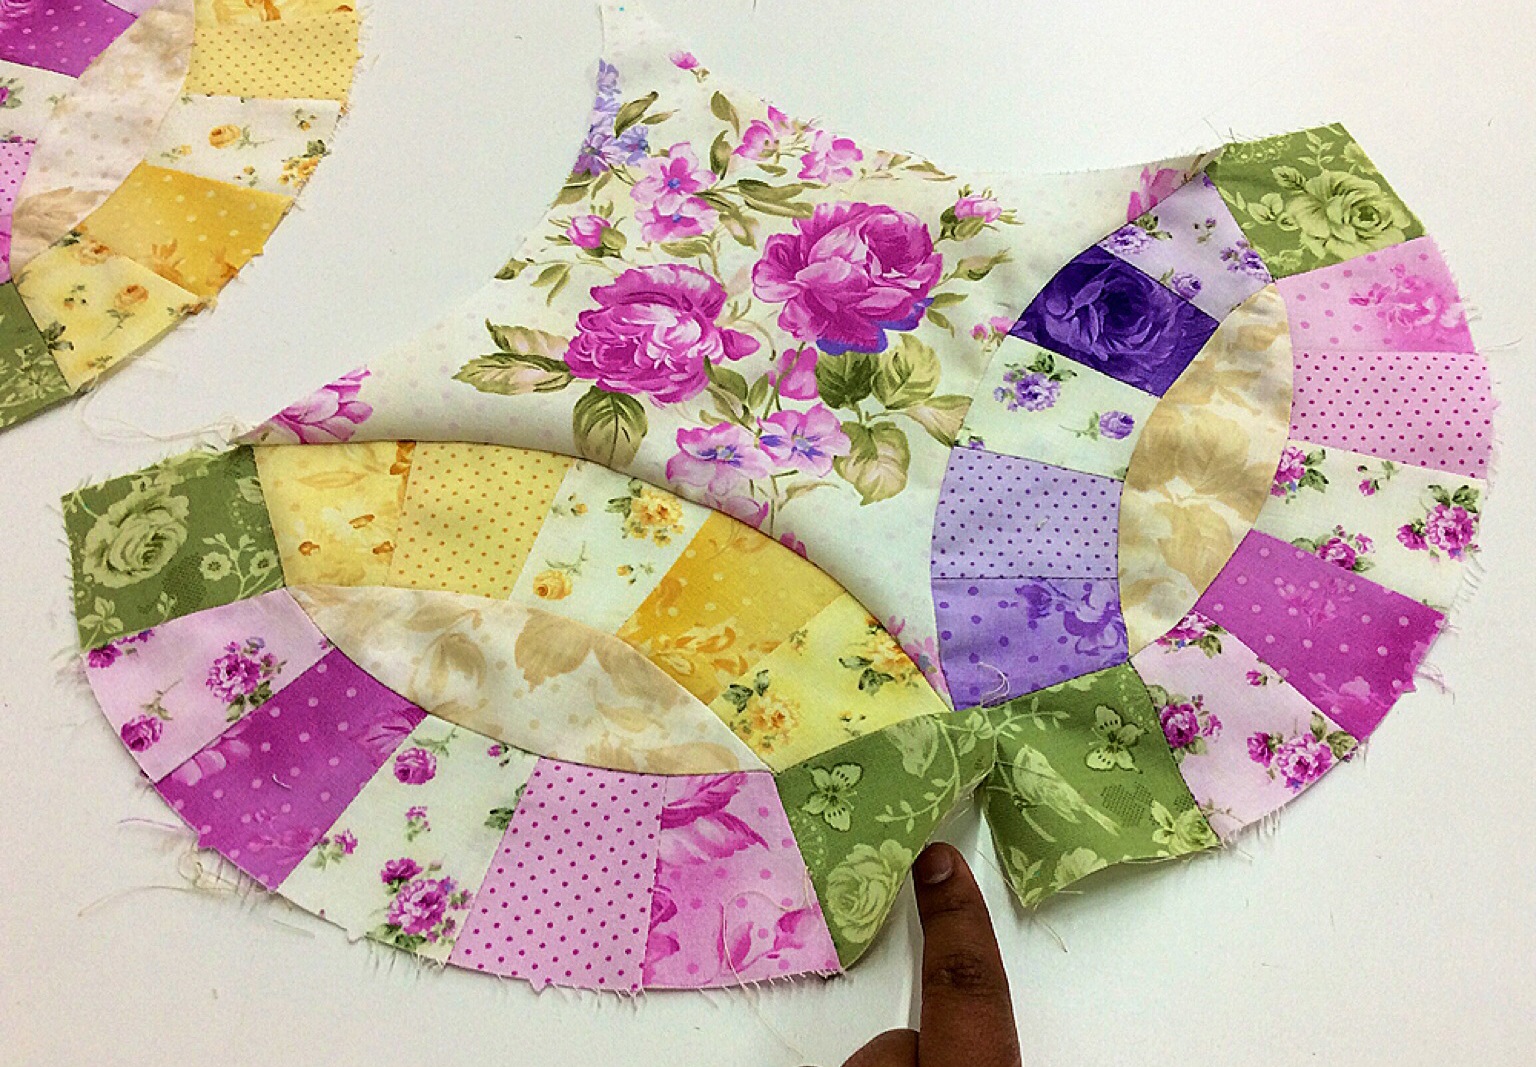
I laid my square on the end of an arch and start and stop at those 1/4″ marks.

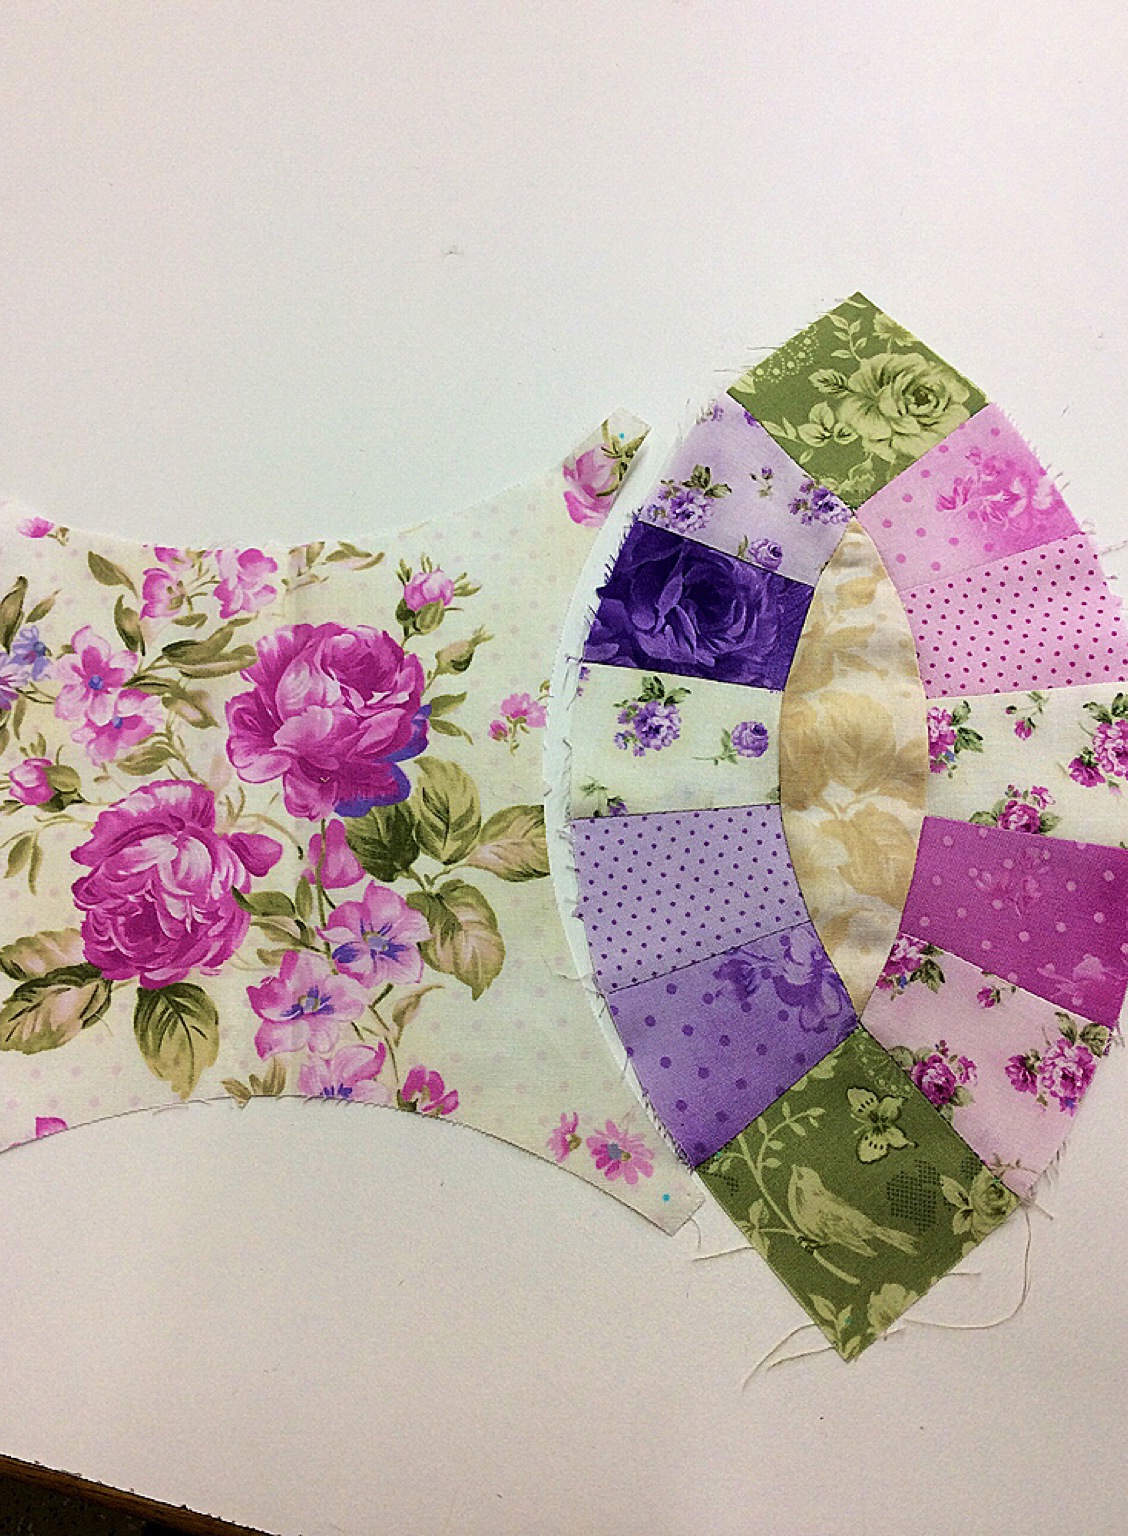
After getting my corner squares on, I get the “footballs” ready to sew on.


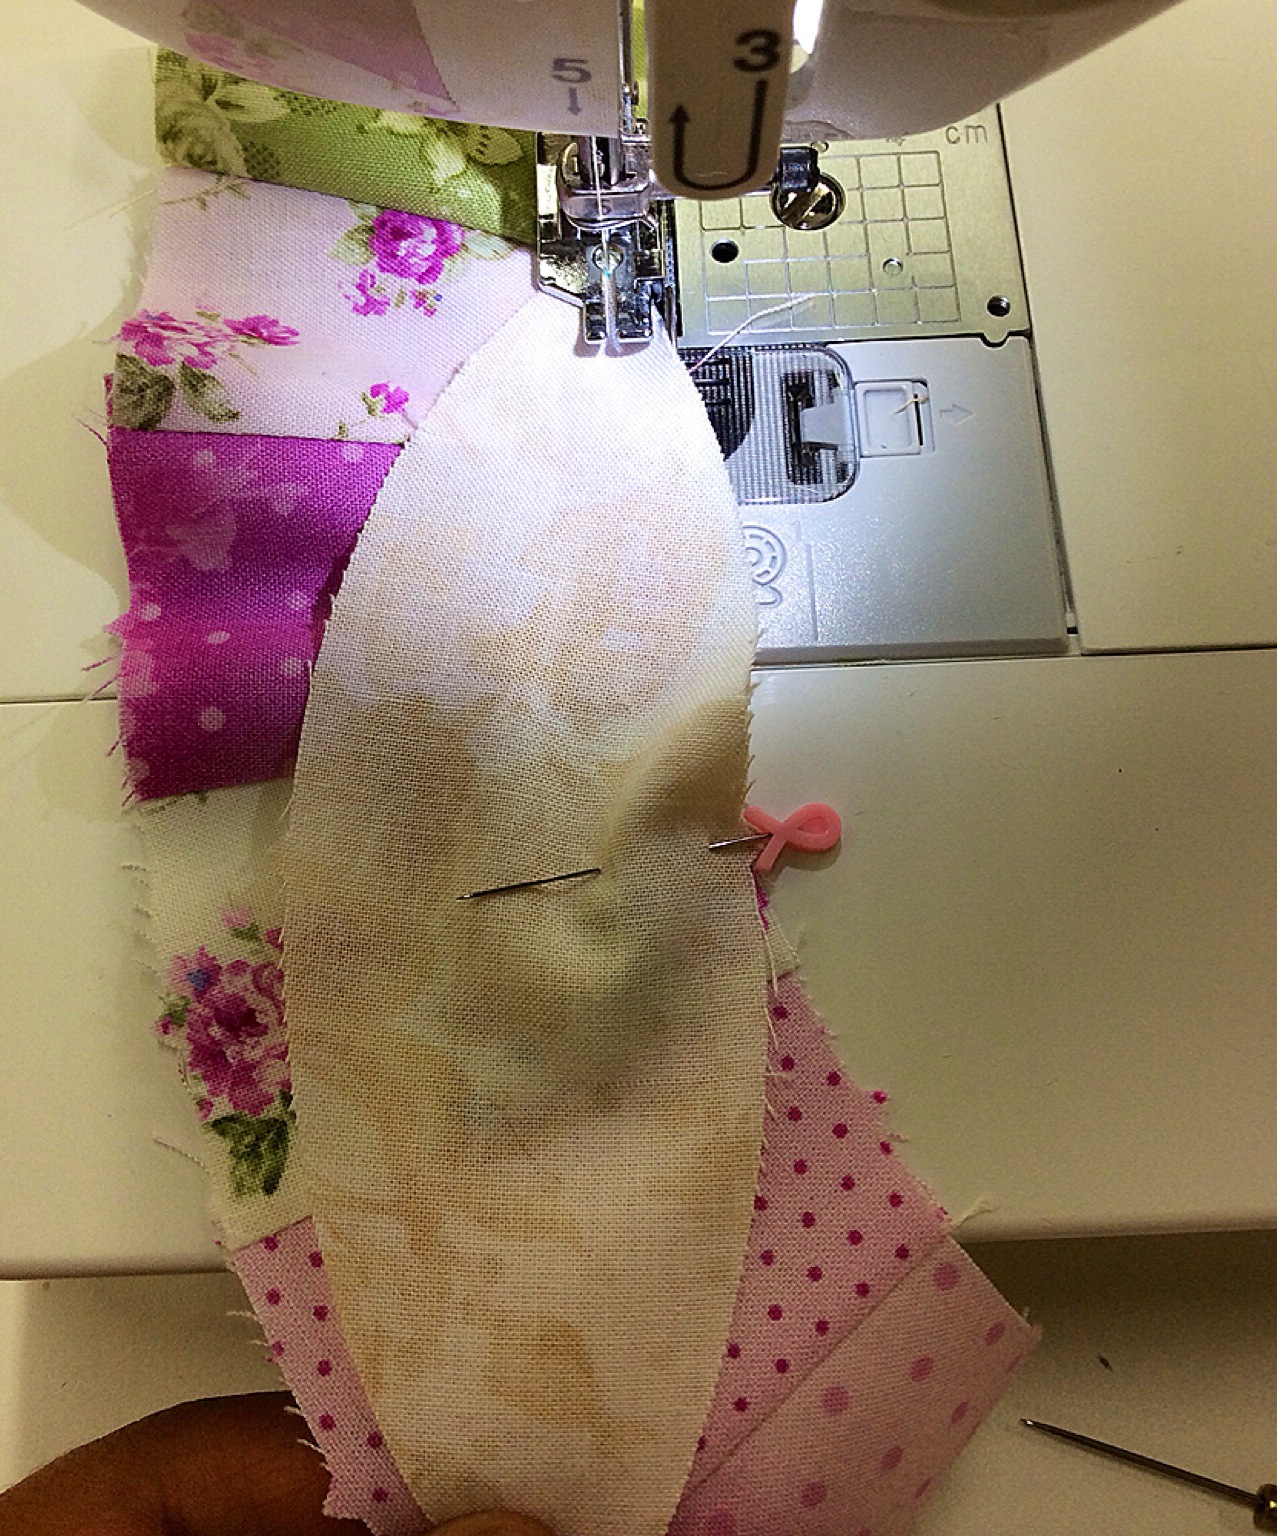

 Just like sewing the squares onto my arches, I sewed from point to point along the “football” edge. I used my hand-dandy stiletto to help keep my fabric in place. A pin in the middle, where AccuQuilt has generously cut a notch to mark the spot, really helps!
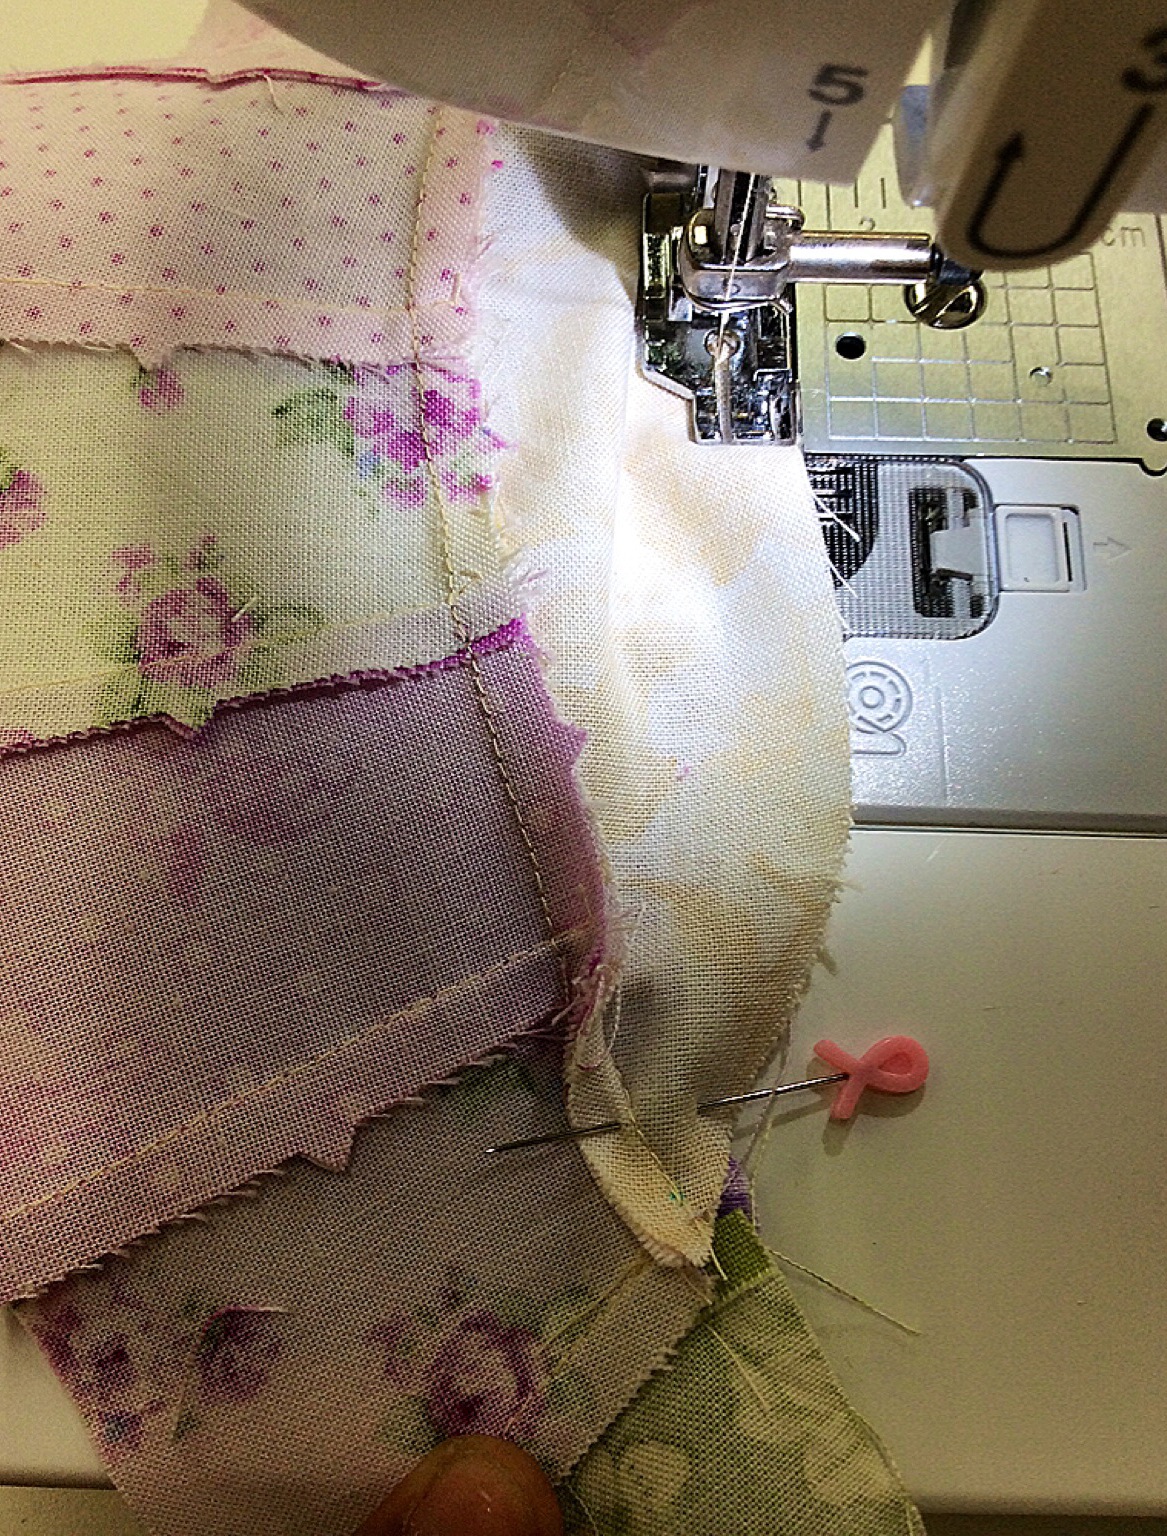

And just like that, I sewed my square ends together(point to point) and part of my ring is done! Now to start putting whole rings together.


I continued to sew from point to point, using a pin to match the center notches, and viola!
I sewed up my rings in batches, because of course, life is in session and interrupting my sewing. Lol

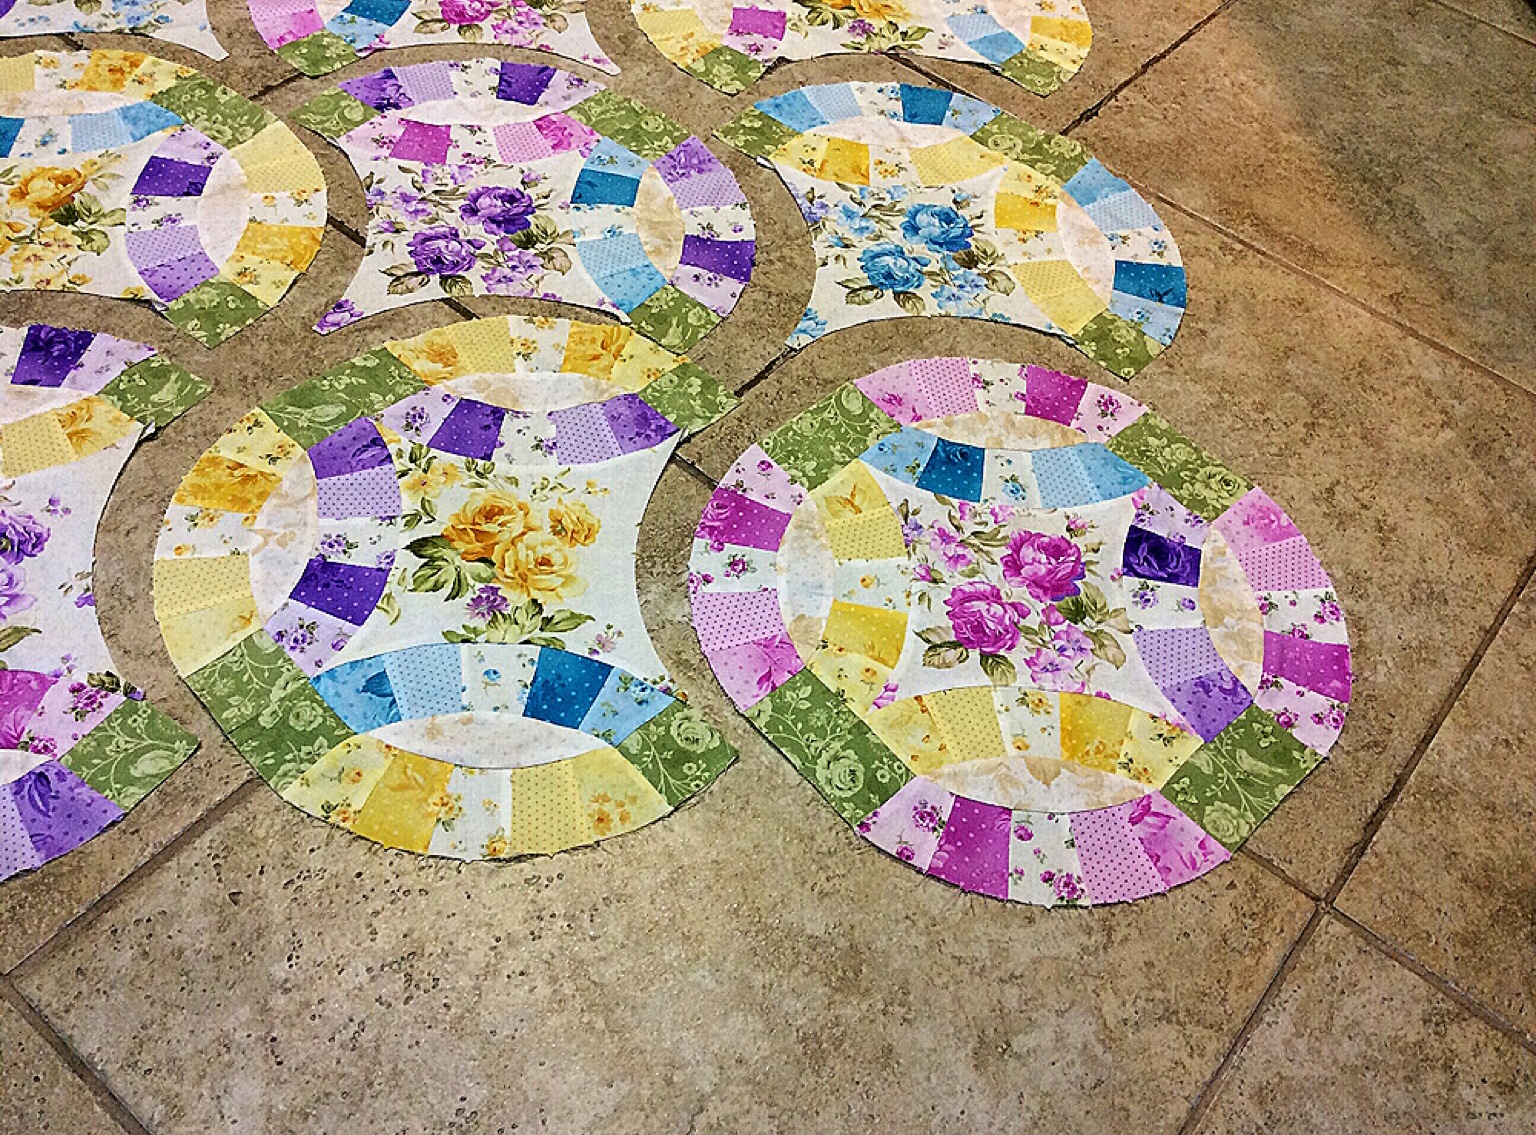
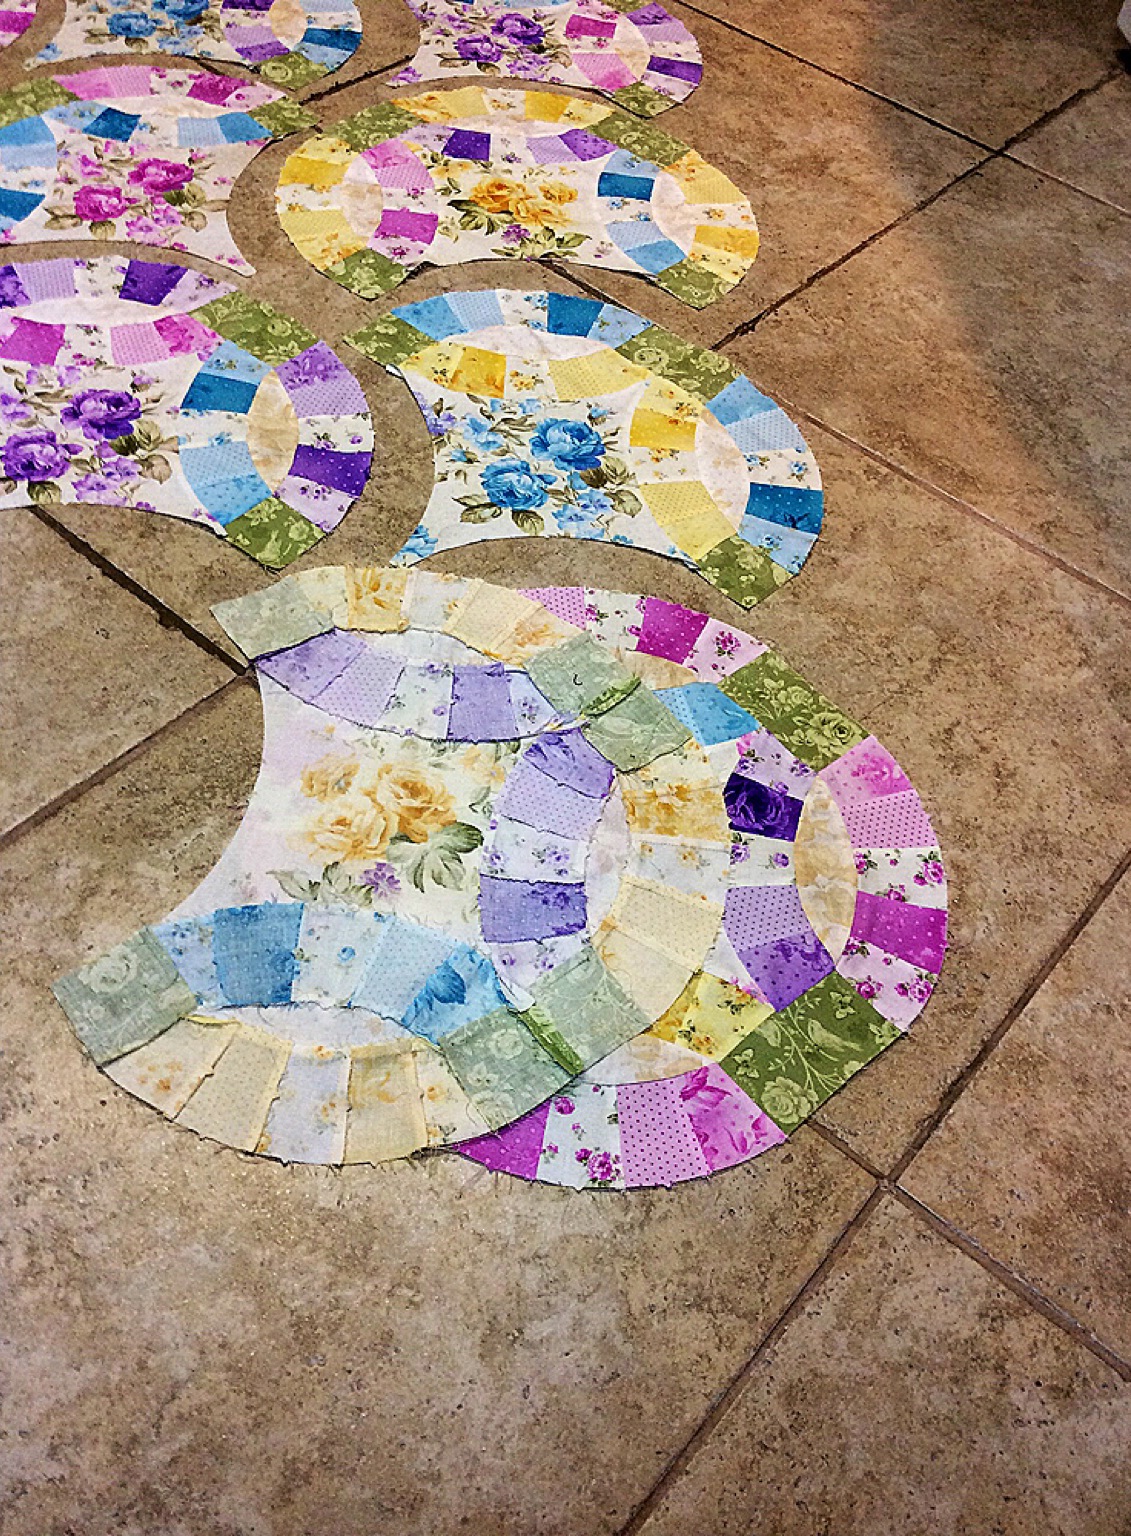
I decided to sew my rings in rows to make it easy to assemble my top.
I laid the middle ring onto the bottom right ring and got to sewing.
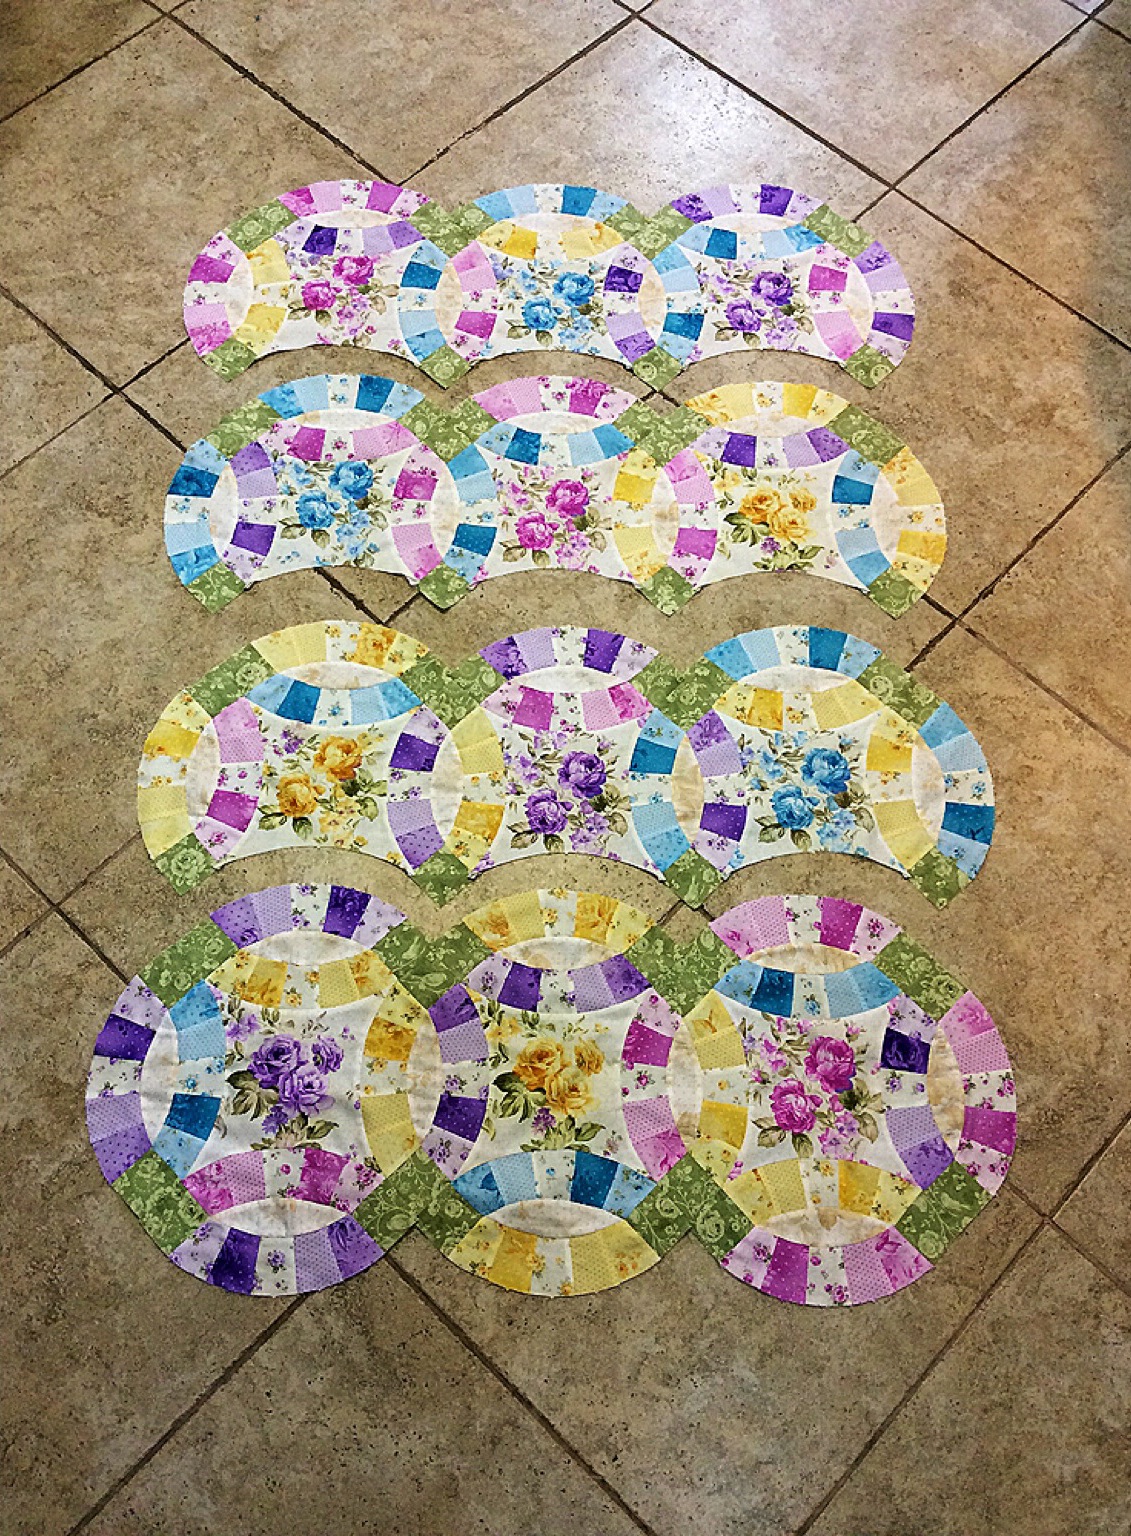
After I got my rows sewn, I sewed them top to bottom, starting and stopping at the points. It’s a little challenging if you haven’t done Y-seams before, but it is SO REWARDING ! This is my favorite quilt to date!!


Unlike most people, I actually enjoy basting my quilts. 🙂
I like to spray AND pin baste my quilts. It’s a workout in itself, and my fingers are always upset with me hours after basting. But I enjoy it! And this was a small quilt , 36″x52″, so it only took a couple hundred pins to be done.:P
I did some stitch-in-the-ditch on my quilt to start because I had no ideas on how to quilt it. How do people even design stained glass?! Lol
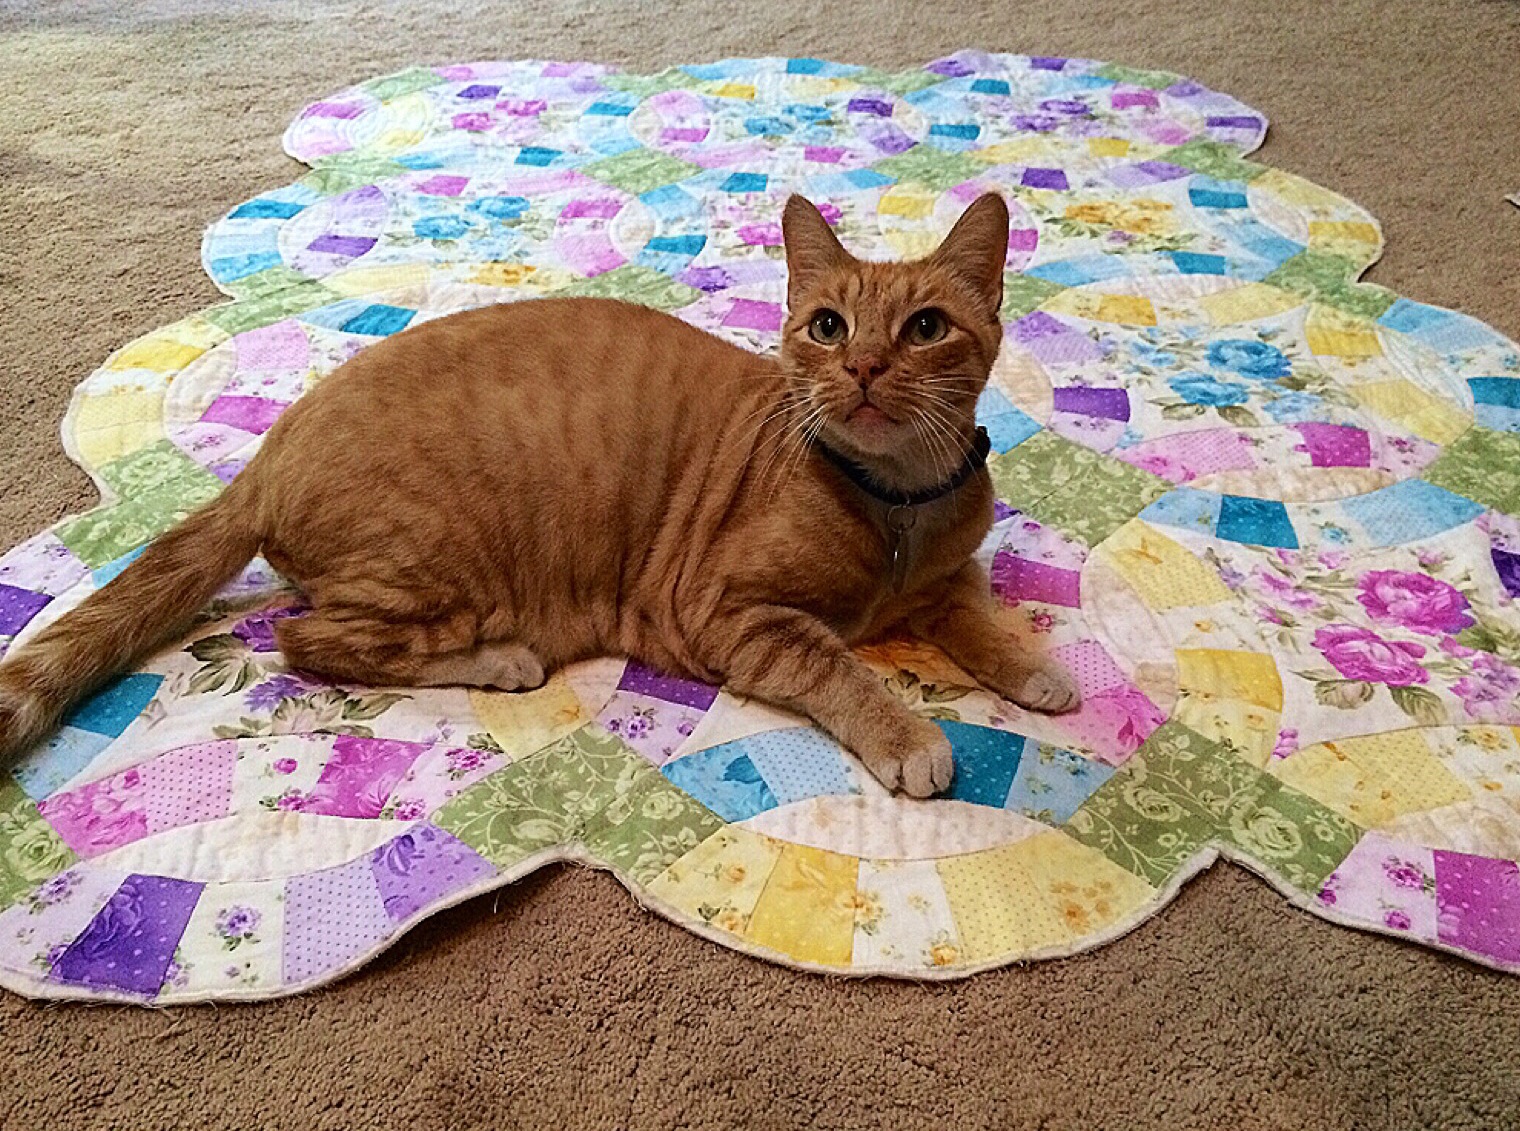
Timmy decided he would sit on my quilt while I prepped my binding.
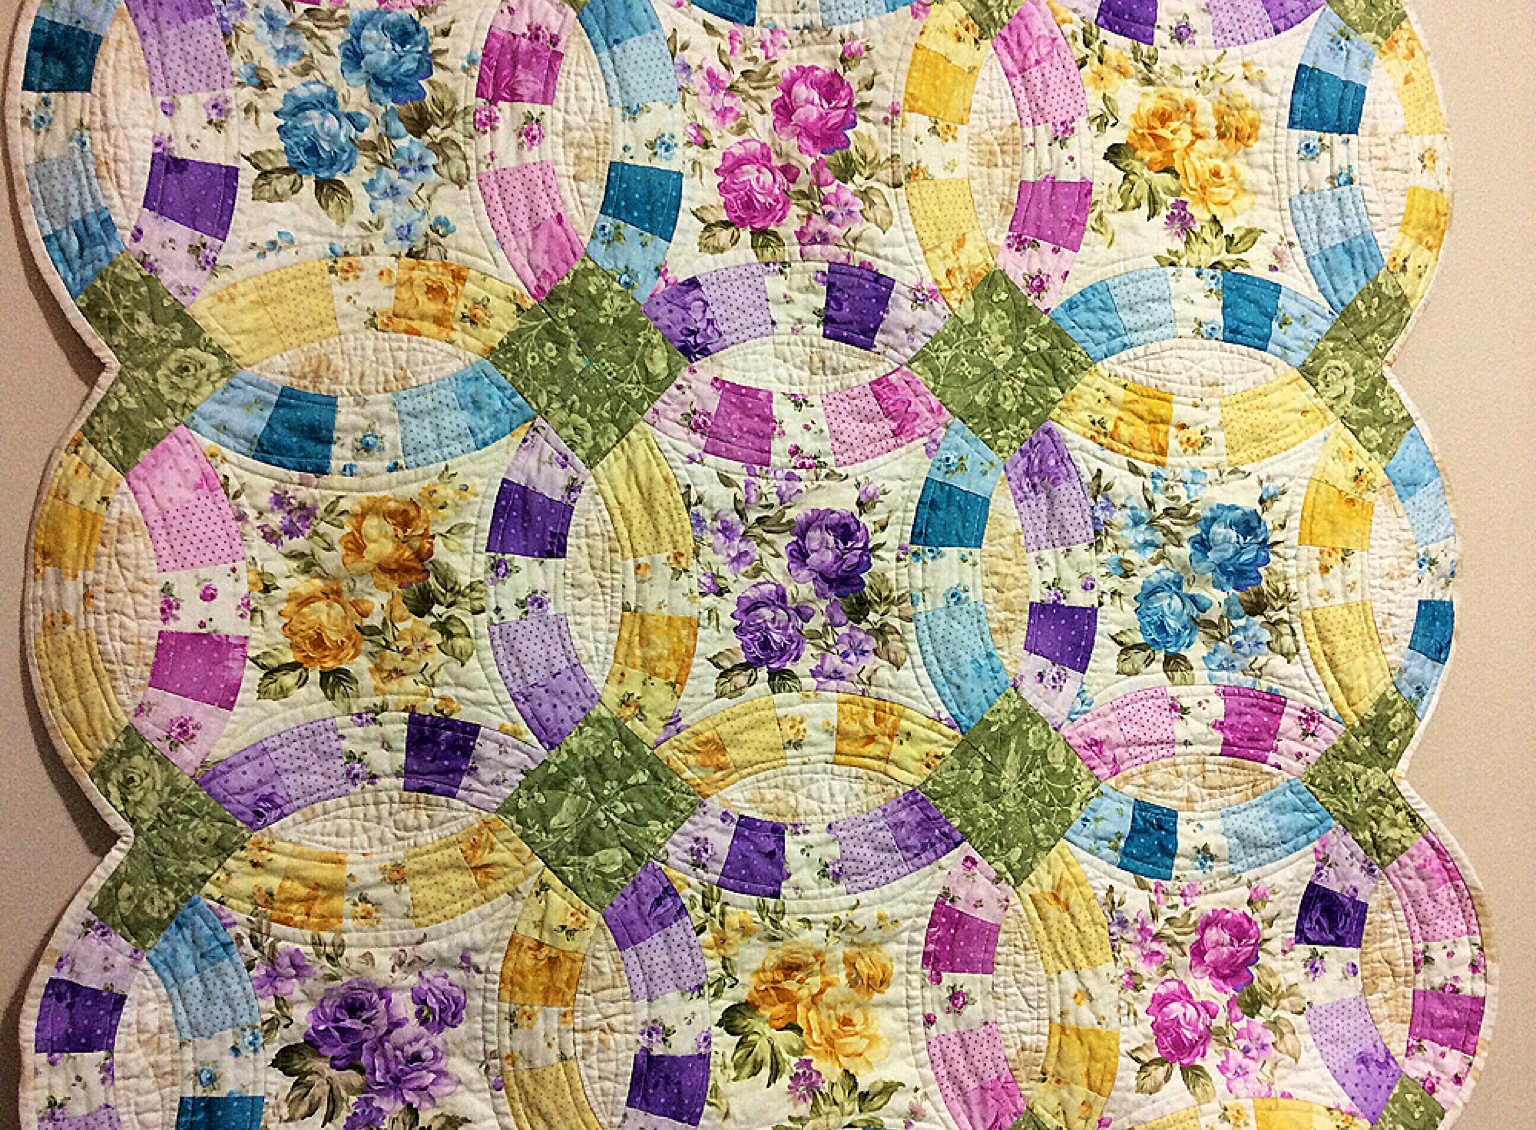

 Then it came to me, a simple outline in the centers and arches, little swirl- like “footballs” and leaves in the squares surrounding the floral centers. 🙂
This quilt has been a lot of fun to make from start to finish, completed at 36″ by 52″!
I will definitely make more double wedding ring quilts now that I have the AccuQuilt B.O.B. die!
Make sure you check out what the other bloggers are doing with their B.O.B.!
August 18th – Samplings from a Blue Ribbon Girl – GO! Flowering Snowball
August 19th – Strip Quilter – GO! Ohio Star
August 20th – Freemotion by the River – GO! Log Cabin
August 21st – A Quilting Life – GO! Dresden Plates
August 22nd – Pleasant Home – GO! Blazing Star
August 23rd – Living Water Quilter – GO! Hunter Star
August 24th – Ray’s Sew Crafty – GO! Double Wedding Ring
August 25th – Blue Feather Quilt Studio – GO! Rob Peter to Pay Paul
August 26th – One Stitch at a Time – GO! Double Wedding Ring
August 27th – Beaquilter – GO! Log Cabin
August 28th – Sew Incredibly Crazy – GO! Rob Peter to Pay Paul
August 29th – Sew Fresh Quilts – GO! Ohio Star
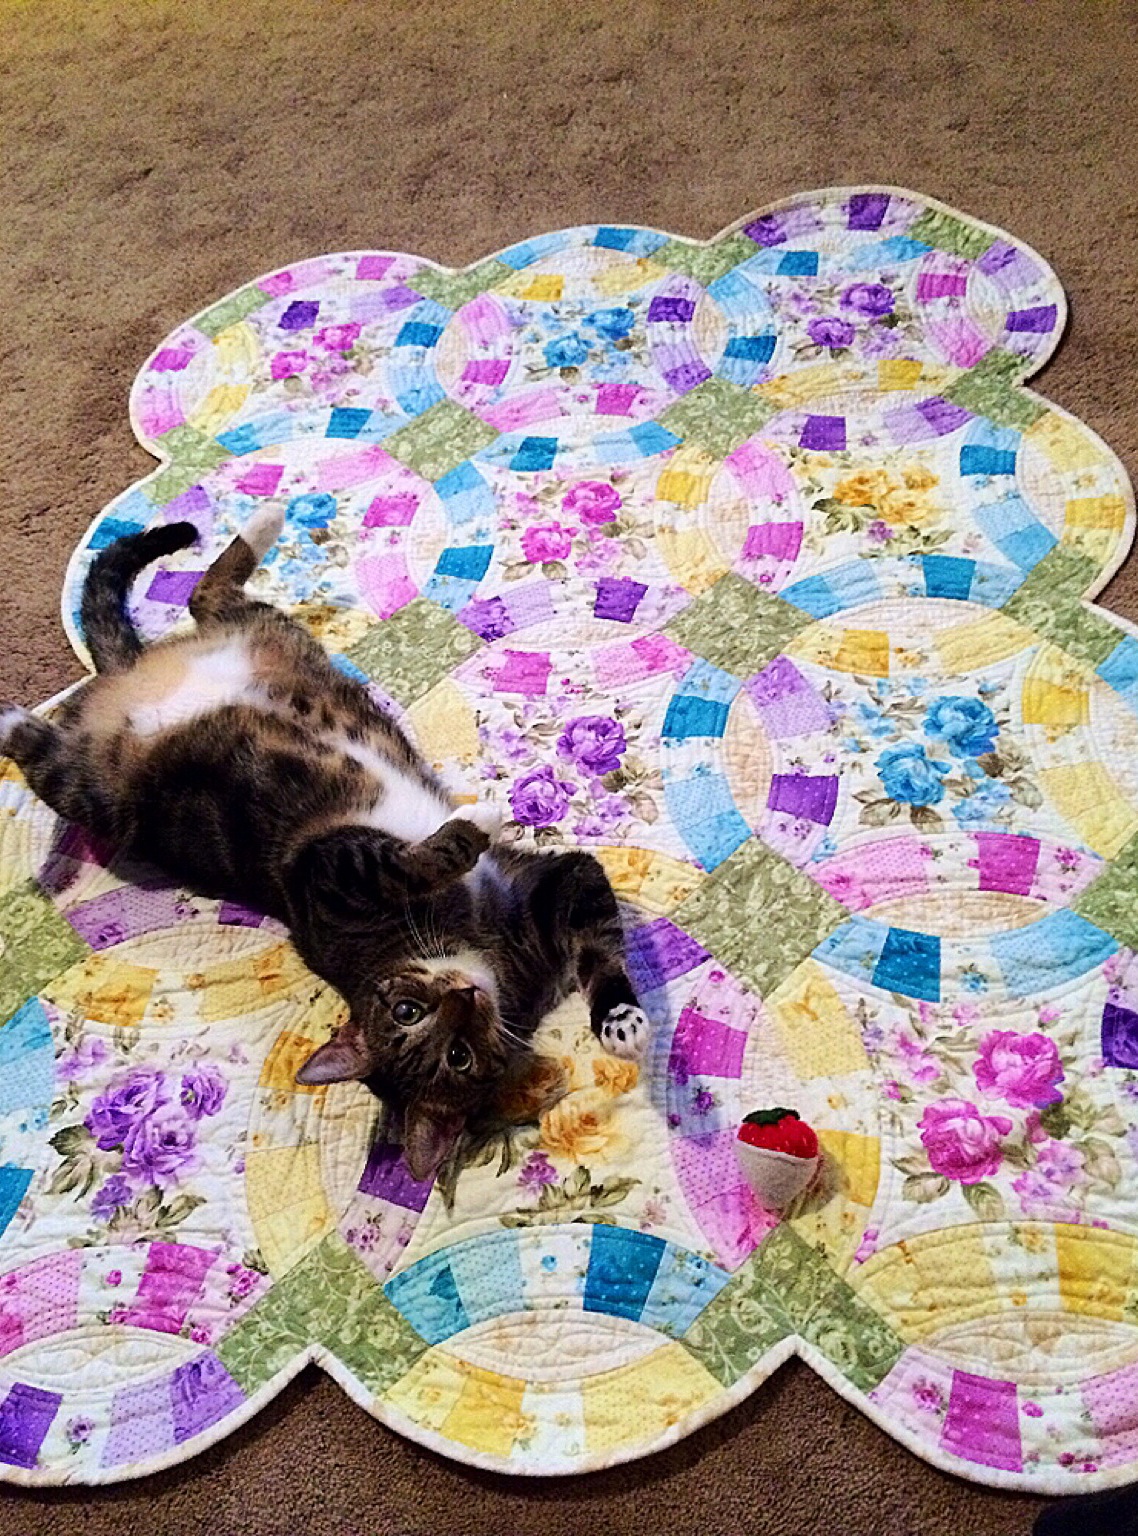
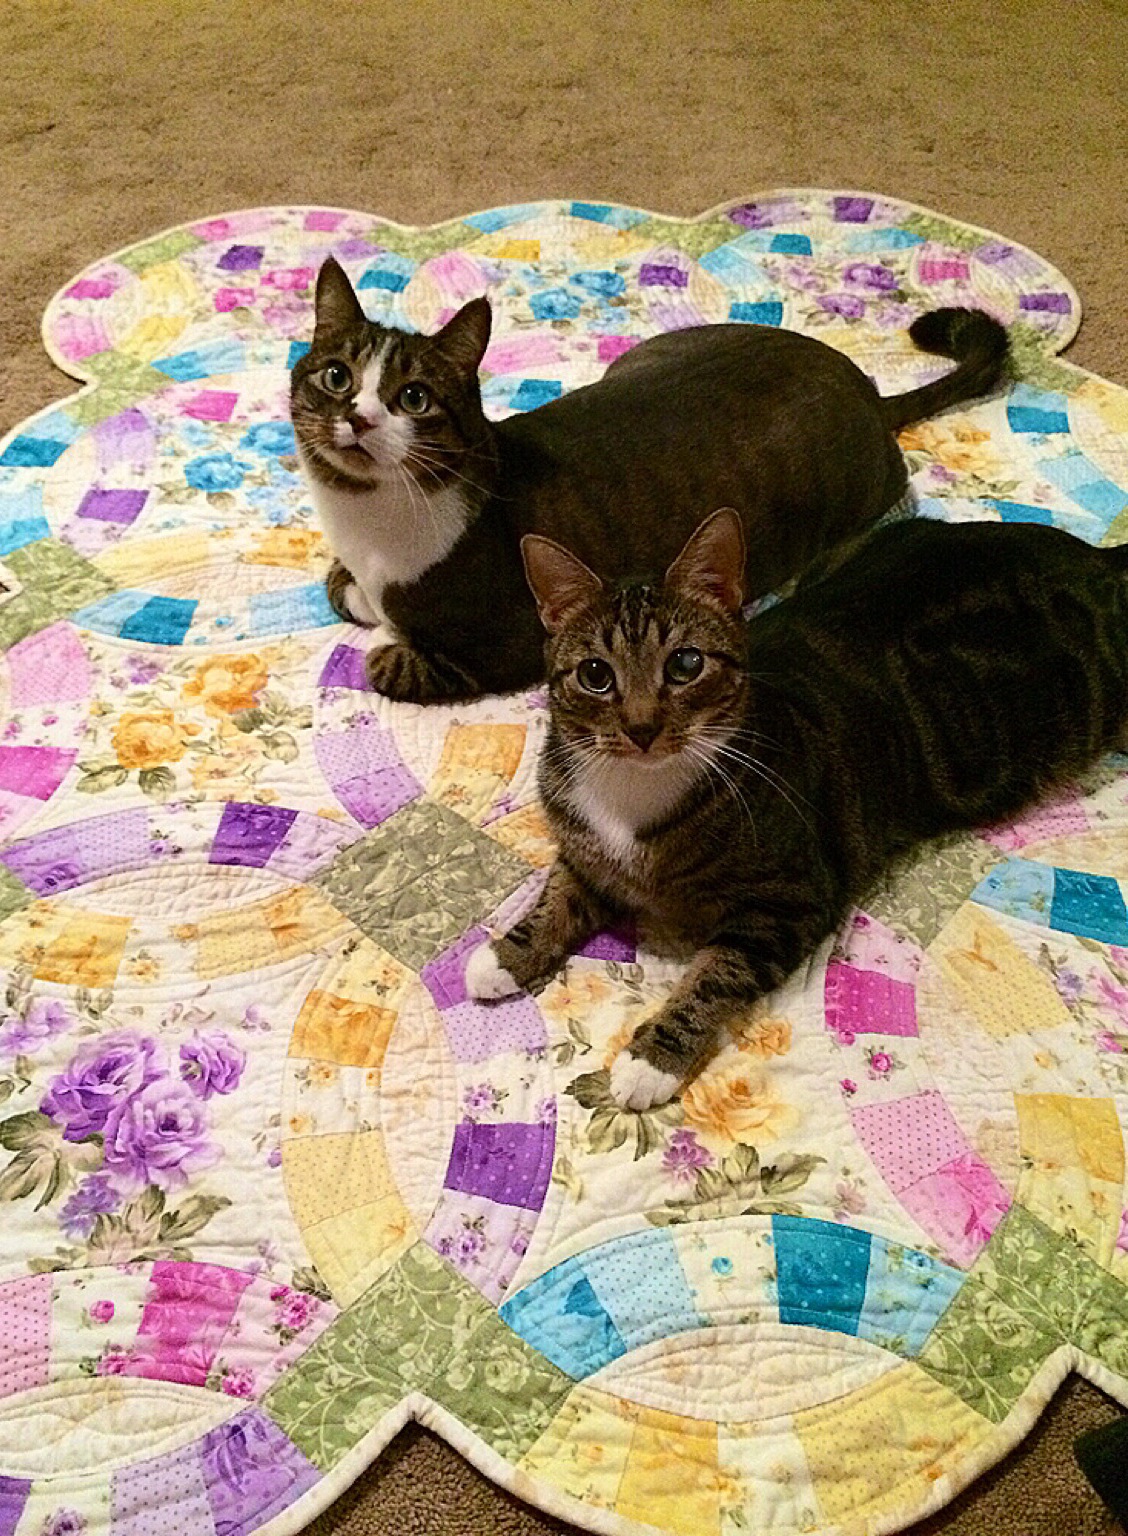
With adorable pictures of Jeanie and Ray enjoying my new quilt, I leave you. I do hope that you’ve enjoyed my blog post and project, as well as inspire you to sew something today! 🙂
Toodles for now,
Diana, Timmy, Jeanie and Raymond ❤

The colors you chose for your quilt are just fabulous. It really has a vintage antique feeling to it. Thanks for the great tips on how to construct the block.
LikeLike
Beautiful job Diana. I have some dies but double wedding is not one I did once cutting by hand each piece and I love the results ,but I am sure with accuquilt is easer .congratulations.
LikeLike
Oh my, this quillt is just beautiful! The colors are sooooo pretty!
What size is this quilt? thank you for the tutorial.
LikeLike
Thank you!
I just added the sizes in the post, I forgot about the sizes! Lol
It is completed at 36″ by 52″! 🙂
LikeLike
This is a super “WOW” quilt. Your tutorial was fantastic, loved loved your stained glass and fabric choices. Loved your tenacity to dig in and get started. I’ve always loved this pattern and would love to give it a shot! Thanks so much!
LikeLike
Thank you for a great tutorial from start to finish! One of the best I’ve seen in the AccuQuilt Blog Hop! I’m encouraged to try this block now, thanks to you and your tutorial! Huggers!
LikeLike
Wow, Diana! Your Double Wedding Ring quilt is incredible! Great photos and it is so nice to see all the steps of putting this quilt together. You make it look sew easy!
LikeLike
WOW! I’ve always wanted to make a wedding ring quilt and have even put away some 30’s reproductions for one, but never wanted to start cutting all those pieces either. I’m inspired. Your step by step instructions are easy to follow. I never knew that the pieces cut on the Accucut had the tabs to help a line the fabric. Thanks for showing us how easy it can be!
LikeLike
this is awesome! love all the detailed pics and the yummy colors
LikeLike
Loved seeing all the steps in creating your Double Wedding Ring Quilt and great tips for Y seams!
LikeLike
I loved all you tips and your colors. You are inspiring me to make another Wedding Ring soon.
LikeLike
Double wedding ring quilts are beautiful. Thanks for the tips on sewing y seams! I love BOB dies. They save so much time.
LikeLike